Showing posts with label main dish. Show all posts

Tuesday, October 22, 2013

Sunday Dinner Volume II

Now that the colder weather is steadily becoming more frequent, I start whipping out Sunday dinner type meals more often. When it's in the 30s outside with the sun 'taking a nap' as my daughter likes to put it, there is nothing more comforting than having a pork roast slowly roasting in the oven, with a couple of pots on the stove top simmering away. 

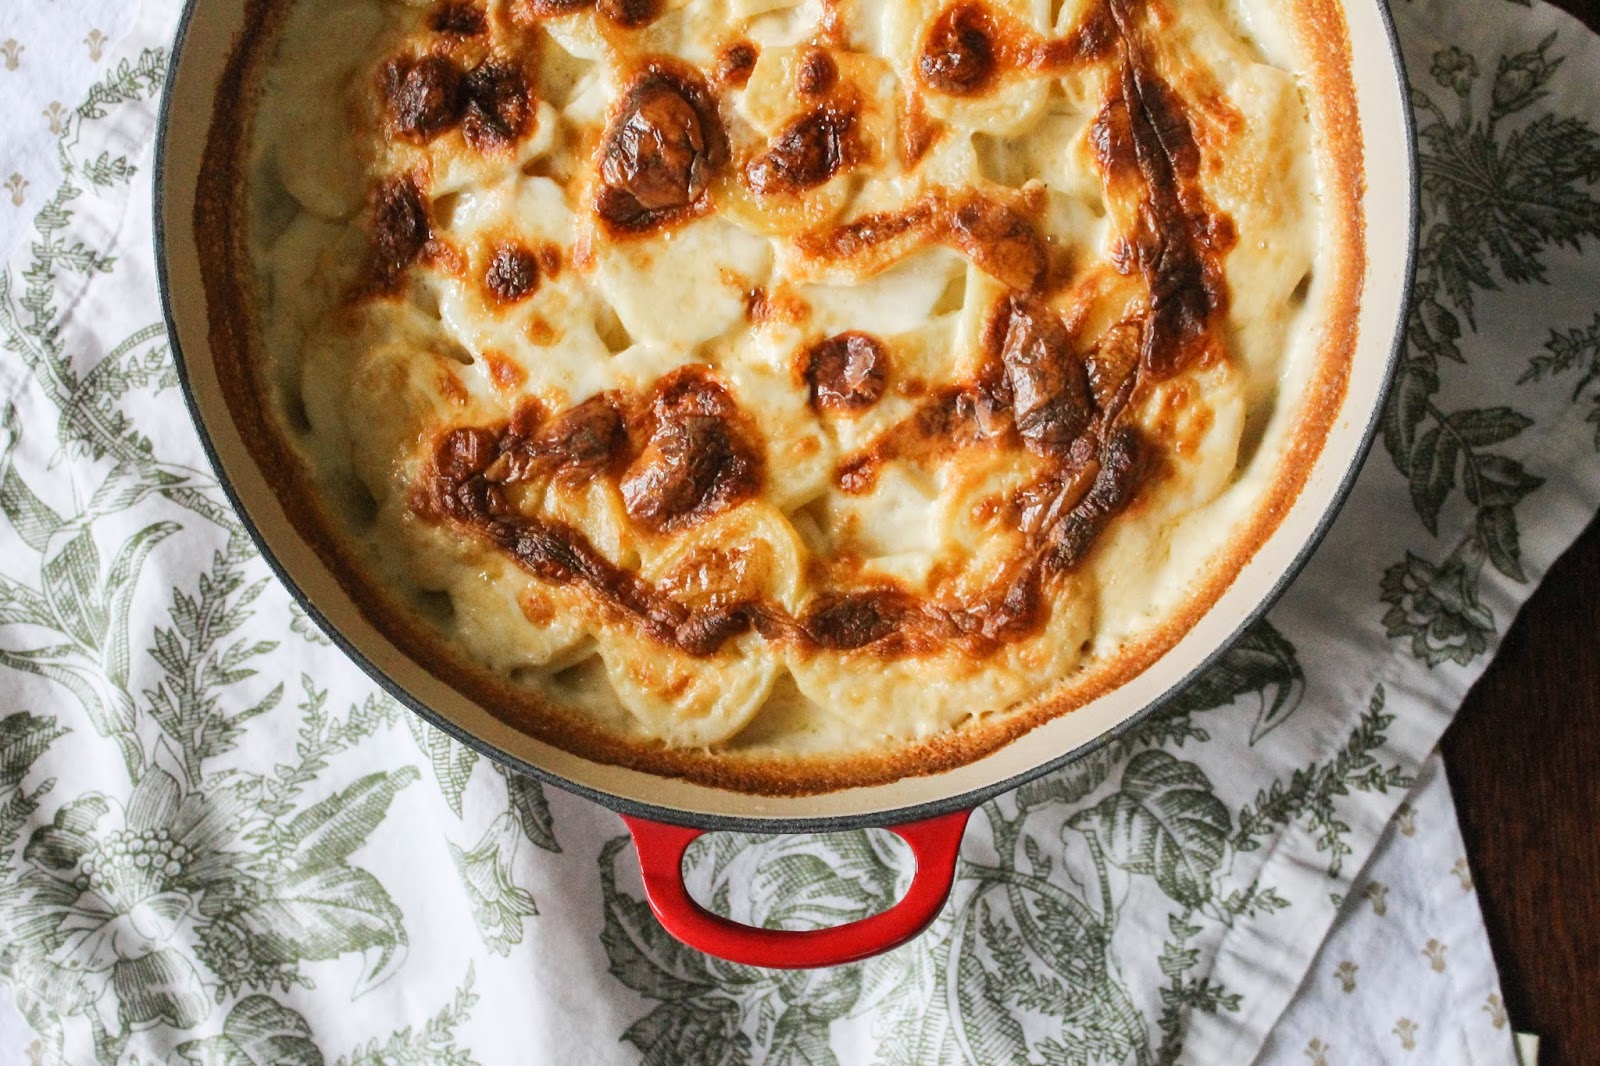
The main reason I had to come up with a good old fashioned family dinner was because I had a yen for dauphinoise potatoes. Not a dish that cozies up quite the same to a ham sandwich (well, maybe when eaten cold the following day- very good, by the way) or a bowl of chili. I love chicken with this, but wanted to use a pork roast so I could have plenty of left overs to go with some super yummy ramen broth I'd been saving in the freezer. Which is why I kept the seasoning of the roast itself pretty simple, and chose the 'wow' factor to come from the groan inducing sherry cream sauce. This sauce is so good, if I could get away with it I'd make extra and serve it in little demitasse cups along the side. Good gravies and sauces are so well loved on my side of the family, that we don't think it is wrong in any way to straight up imbibe them. 

All of these recipes are very simple and can be made with complete ease as long as you have enough time. That is the beauty of a good Sunday dinner - a tiny bit of prep, and then relax on the couch while you enjoy all the luxuriant smells coming out of the kitchen. And, the leftovers. So good, and so many things you can do with them. For example, eating the dauphinoise potatoes cold, straight from the fridge. 
There are lots of dauphinoise potato recipes out there, but my favorite is Jacque Pépin's simple tried and true version. No cheese here folks, and you will not miss it. Not even a little. The aromas that flood your home as these bake in the oven are divine, and my daughter who is a devout potato hater, (even french fries sometimes) gobbled these up without a trace of encouragement. 

INGREDIENTS

for the brined pork roast and sherry cream sauce

1 2 - 3 lb boneless pork loin roast, any silver skin removed
2 quarts cold water
4 garlic cloves, peeled and smashed
12 - 15 pepper corns
1 bay leaf
1/4 cup sugar
1/4 cup table salt or ~1/2 cup kosher, depending on brand
1 Tbsp canola oil

1/3 cup dry sherry
1 shallot, minced
1 garlic clove, thinly sliced
1/2 cup heavy cream + 1/4 cup whole milk, or 3/4 cup half and half
1 - 2 tsp apple cider vinegar
salt and pepper to taste

Place all ingredients except the pork roast in a large pot with a lid. Mix well with a wooden spoon till all the sugar and salt is dissolved. Add the roast, cover, and place in the fridge for 1 to 2 hours, depending on the size of your roast. 

Preheat oven to 375*. Remove roast from the brine and thoroughly dry it off with paper towel. Add the canola oil to an oven safe pan and place over medium high heat. Sear all sides of the roast to golden brown. Place in the oven and roast till internal temp reaches 135*, about 45 minutes to 1 hour 15 minutes, depending on size of roast.

Remove from oven and let rest on a cutting board for at least 15 minutes before slicing. 

Meanwhile, place the pan that the pork cooked in back over medium low heat. Add a touch of canola oil and the shallot. Saute for a couple minutes, then add the garlic and cook for another minute or so. De-glaze the pan with the sherry, scraping up all the brown bits and let reduce by nearly half. Add the cream and milk and bring to a simmer, then reduce heat to low and let simmer for 3 - 5 minutes to let it thicken, stirring often. Stir in the apple cider vinegar, then taste for seasoning. Add any pork juices that have accumulated on the cutting board and stir them in. Since the roast is brined, the pan juices will be quite salty, so it's best to wait till the end to season the sauce if needed. 

Slice into half inch thick pieces and adorn with copious amounts of sherry cream sauce.

for the dauphinoise potatoes

1 3/4 lb potatoes, peeled (I used red bliss, but 
   Jacques recommends yukon gold)
2 1/2 cups whole milk
3 garlic cloves, minced
scant tsp kosher salt
1/2 tsp ground black pepper
1/8 tsp freshly ground nutmeg
1 cup heavy cream
1 Tbsp unsalted butter, softened

Preheat oven to 375*. Combine the milk, garlic, salt, nutmeg and pepper in a large sauce pan. Slice the potatoes 1/8 inch thick and add them to the pan as you go to ensure they don't get discolored.

Butter a large (at least 6 quart) baking dish with the softened Tbsp of butter.

Turn the heat on to medium high and bring the mixture to a gentle boil, stirring often to prevent the slices of potato from sticking to one another.

Once it reaches a boil, add the ingredients to the buttered dish and spread them out evenly. Add the heavy cream. Bake on a baking sheet (just to be on the safe side) for up to one hour, or until most of the liquid is absorbed and the potatoes are easily pierced with a knife. Let the dish stand, covered, for 20 - 30 minutes before serving to allow it to completely set. 
I was in the mood for petit pois with pearl onions swimming in butter for this meal, but endive with mushrooms and peas would probably go even better. 

Dauphinoise Potatoes slightly adapted from Jacques Pépin's Gratin Dauphinoise

Wednesday, August 7, 2013

Three Cheese Baked Ziti with Spinach

This is one of my husband's favorite dishes. I always make it on a Friday so him and the little one can slowly house it over the weekend while I'm at work. And of course, it's another vehicle for spinach. It couldn't be easier, and I nearly always have the ingredients on hand. There is a lot of cheese in this, so instead of grabbing a jarred pasta sauce, which is the easiest route, I tend to go for unsalted diced tomatoes from a can to make a quick sauce. It only tacks on a few more minutes, but it is definitely worth it for the flavor you end up with. 

You can also get this pasta dish assembled ahead of time and keep it in the fridge for a few days before you bake it off. Need to freeze it for up to 3 months? No problem. Ensure it's tightly wrapped with plastic wrap, then foil, and place in the deep chill. Just thaw it in the fridge at least 1 day in advance before baking @ 350* for ~90 minutes, till the cheese starts to turn golden and the sauce is bubbling up on the sides.

INGREDIENTS

1 lb ziti, cooked a few minutes
   shy of al dente
1 28 oz can + 1 14 oz can unsalted
   diced tomatoes, pref organic
1 small onion, finely chopped
1 tsp dried oregano
1 tsp dried marjoram
2 garlic cloves, chopped
pinch of salt and pepper
1 1 lb bag frozen chopped 
   spinach, pref organic
~6 ounces soft goat cheese
~8 ounces fresh mozzarella
1/2 cup grated Parmesan

Preheat oven to 350*. Set a large pot of salted water on the stove to boil. Meanwhile, set a large (12") non-stick skillet over medium heat and add 1 Tbsp or so of olive oil. Add the onion and saute till translucent, about 8 minutes. Add the frozen spinach and cook, stirring occasionally for 8 more minutes. Blitz the tomatoes, garlic, oregano and marjoram in a food processor and add to the spinach. Simmer on low for about 10 minutes. Add salt and pepper to taste.

Cook the pasta 3 minutes shy of al dente per brand's instructions. Drain well, and place back in pot. Pour over the spinach and tomato sauce. Crumble in the goat cheese and give only a couple of stirs. Having a few pieces of whole soft goat cheese in here is lovely- you don't want it completely integrated. 

Pour the pasta into your favorite 9 x 13ish casserole dish that has been lightly spritzed with olive or canola oil. Shred the mozzarella with your hands and evenly top the pasta with it. Sprinkle with Parmasan. Bake on the center rack of your oven for about 30 - 45 minutes, or till mozzarella is completely melted and the Parm has started to brown. Allow casserole to sit for 5 - 10 minutes before serving. 


Sunday, July 7, 2013

Sunday Dinner Volume I

Since I started cooking for myself, nothing said Sunday dinner to me like a good roasted chicken. There are literally thousands of ways to prepare it, and it can tend to be a fickle main course. I've never had it turn out the same way for me, yet fortunately if it was started with a really good chicken, they've never been bad. A winning preparation in our home is usually roasting the bird in a searingly hot oven atop a wire rack over thinly sliced potatoes. This encourages a crisp skin on the chicken as well as some absurdly good potatoes that have been 'oven fried' in a sense, in the chickens juices and fat, as well as the compound butter that had been spread under the skin. To change things up a bit for these warmer days, I omitted the satisfyingly greasy and crisp potatoes for a lighter version tossed with yellow haricot vert and a lemony vinaigrette. Some bitter mustard and collard greens or rainbow chard accentuate the richness of the chicken. Perfect summer time version of a wintery comfort food classic in my humble opinion.
The vinaigrette I made for the potatoes and beans uses a shallot oil that is very easy to make. I added some thinly sliced garlic and used the fried alliums to top my greens - this shallot oil is a real power player, let me tell you. I saw it on 101 Cookbooks and knew I had to try it immediately. Super versatile and with a long (refrigerated) shelf life, it is definitely worth slicing all those shallots.

To cut down a bit on my stress level, I like to make the shallot oil and greens the day before or morning of this meal. That way all I have to worry about is popping the chicken in the oven, boiling my potatoes and beans and quickly whisking up a vinaigrette. 


for the greens:

1 cup extra virgin olive oil or sunflower oil
1 cup thinly sliced shallots, ~15 - 20
10 cloves thinly sliced garlic
1.5 - 2 lbs greens of your choice, such as collards, mustard, chard or a combination thereof that have been thoroughly washed and loosely chopped
1/2 tsp salt
1/4 tsp freshly ground black pepper
1/4 cup apple cider vinegar
~1/2 cup low sodium vegetable stock

In a large saucepan, add the oil and heat over medium low. Add the shallots first and cook for about 4 - 5 minutes, till they start getting a little golden. Add the garlic and continue cooking, stirring frequently, till everything is golden and crisp. Turn off the heat and remove the crispy alliums to a paper towel lined plate. Let the oil cool to about room temp and place all but 2 Tbsp into a container with an air tight lid. Place this in the fridge.

Place pan over medium heat and add the greens, followed with the salt and pepper. Toss well until they begin to uniformally wilt. Add the vinegar and stock. Cover and cook for 25 - 35 minutes (depending on the greens your using - chard is quicker than the heartier greens), stirring occasionally. If the pan gets dry and the greens start sizzling, add a generous splash of stock. Once the greens are done, set to the side and let cool (if serving later) and store in an airtight container in the fridge. If not, serve immediately and top with the fried shallots and garlic.

for the chicken:
                                                                                 

1 3 - 4 lb organic free range chicken, locally raised if 
   available 
4 Tbsp unsalted butter, softened
3/4 tsp kosher salt
1/2 tsp freshly ground black pepper
2 garlic cloves, finely minced or grated 
1 heaping tsp dijon mustard
zest of whole organic lemon

Preheat your oven to 450*. Combine the butter and remaining ingredients in a small bowl and mix well- this can be done up to 3 days in advance; just bring to room temp before using. Set aside.

Spatchcock your chicken by removing the back bone with kitchen shears. Pat the chicken dry with paper towel. With the chicken breast side up, firmly push on the breast bone to break it. Gently slip your fingers under the skin and separate it from the meat, ensuring to release all the membranes attaching the skin to the chicken. Place about 1 Tbsp of the compound butter under each section of the chicken with a spoon. Spread the butter over the meat by moving your fingers over the skin - it is much easier this way and will actually stay under the skin. Spread any remaining butter over the skin and sprinkle lightly with salt and pepper. Tuck the wings under the breast to keep from burning.

Place chicken on a baking sheet lined with a wire rack, or silpat. Ensure there is a rack on the 2nd to top level in your oven, and place your beautifully buttered bird onto the rack. Roast for 45 minutes to 1 hour, depending on the weight of your chicken. I've made this a lot, so I can usually tell by the smell and feel of the chicken if its cooked through. If you're a bit wary of this, use a good meat thermometer. I believe 160 is recommended for the breasts and 165 - 175 for the thighs. Let the chicken rest for at least 10 minutes before carving.


for the potatoes and beans:

3 - 5 medium or small yukon gold potatoes, cut into 1 inch
   pieces
~1 lb haricot vert or regular green bean, trimmed
juice of the zested lemon
1/4 - 1/3 cup shallot oil (I like my vinaigrettes on 
   the vinegar-y side; a traditional ratio is 1 part
   acid to 3 parts oil)
1 tsp dijon mustard
salt and pepper

Place a large pot full of cold water on the stove and add the potatoes. Crank the heat to high. Once the water is boiling, add a heavy pinch of salt and cook the potatoes for 3 minutes. Add the beans and cook for 3 more minutes. While the veggies are cooking, whisk together the oil, lemon juice, mustard and a good pinch of salt and pepper. 

Drain the water and place cooked veg into a large bowl. You want the potatoes to be tender yet still firm so they don't fall apart once they're tossed. Pour over the vinaigrette and toss well. This is best served warm or room temperature, so its a great thing to make a while the chicken is resting.

This is a great meal for guests, or just your usual crew. If you end up with any leftover chicken, I'll be posting a 'to die for' chicken salad recipe later this week. It has officially become one of my husband's favorite things, and is a great way to make your leftovers almost better than they were the first time around.


Thursday, April 25, 2013

Chipotle Orange Chicken


This is a long lost recipe that is the first one I've ever written down. I'm usually an improvisational cook and have never measured or recorded dishes I've created. Until this chicken, there was never a need. This recipe has more ingredients than I normally use, therefore I had to document it in order to remember, since I had the feeling I wasn't going to be able to replicate it. Everyone who has tried this is relieved I did!


This chicken is super versatile, and can be used any where chicken is called for in most Mexican dishes - tacos, enchiladas, Mexican lasagna, tostadas, burritos - you name it. It has a pleasant spicy heat from the chipotle peppers that marries incredibly well with the orange. The flavors are kind of an infusion of a mole and carnitas, so some of the ingredients may seem a little odd. But trust me, it makes a mean dish! 

This makes a very large batch, which I think is the only way to go. It is perfect for feeding a crowd, and any leftovers freeze very well - up to 3 months in an airtight container.


 INGREDIENTS
1 Tbsp canola oil
3 lb boneless skinless chicken thighs
2 tsp cinnamon
2 Tbsp cocoa powder
2 tsp cumin
2 tsp dried oregano
1 tsp dried thyme
1 Tbsp garlic powder
1 Tbsp onion powder
1 Tbsp kosher salt
1 tsp black pepper
2 bay leaves
zest of one large organic orange
juice of said orange
spent orange rind
1 head garlic, cloves peeled and smashed
5 chipotle peppers in adobo sauce, diced
1 onion, chopped
3 c low sodium chicken stock 
1 c evaporated milk

Heat oil in a large dutch oven or heavy bottomed pot over medium high heat. Thoroughly dry both sides of the chicken thighs and proceed to brown them in 2 batches. They do not need to be cooked through - just 5 minutes a side to get some color. While the chicken is cooking, place all the dried spices in a small bowl in order to add them all at once after the thighs have been seared. Keep thighs on a plate to the side.

Add onion and smashed garlic cloves to the pot. Saute for about 3 minutes, then add the dry spices. Stir continually for a minute to bloom the spices. Add the orange juice, zest, chicken stock and evaporated milk. If you want it extra spicy, add the remaining adobo sauce from the can of chipotle peppers. Toss in the orange rind and bay leaves, then nestle the thighs into the cooking liquid. Bring to a simmer, then cover and cook on low heat for 45 minutes.

Remove thighs from pot and place on a cookie sheet in a single layer in order to expedite cooling. Once cool enough to handle, shred the chicken with your hands (its the best way!) into bite size pieces. Don't worry about a fine shred here - the chicken will break down more once it is mixed back into the sauce. Meanwhile, allow the cooking liquid to reduce over medium low heat until it is reduced by at least half. This should take about 20 - 30 minutes.

Once sauce has been concentrated, strain it through a fine mesh strainer into a clean bowl. Be sure to  stir and mash the pulpy bits against the sides of the strainer to break the softened garlic through and get all the concentrated flavors out. Scrape the outside of the strainer well to get it all into the bowl. Place sauce back into pot and add shredded chicken. Heat on low for about 5 minutes, or until chicken is heated back through.


I recommend serving this any way you please! Any of your favorite Mexican dishes that call for chicken - try this in place of your norm. It may breathe some new life into your favorite recipe. My favorite is the easiest and probably quickest way - corn tortilla, fat free greek style yogurt, lots of fresh cilantro and a healthy portion of the chicken. Unbeatable.


Tuesday, March 19, 2013

Quinoa and Chickpea Salad

photo updated 10.15.13
This is a staple in our house - and so versatile. You can follow the skeleton I've provided below, use it as an excuse to clean out your fridge, or use some items from the pantry that you've been itching to try. As long as there is quinoa and chickpeas around, there are endless options.

1 c. organic quinoa

2 c. water

1 15 oz can chickpeas, drained and rinsed

3-6 scallions (depending on size), or 1/2 a small sweet onion

10-20 (depending on size) grape tomatoes, halved

1 14 oz can artichoke hearts packed in water, drained and cut into quarters or eighths, depending on size

1/2 c. cubed hard cheese, such as parmesan, asiago, sharp cheddar, etc. 

couple good handfuls of olives, halved (kalamata, green, or any favorite variety) or capers

1/4 c. red wine vinegar

3 tbsp extra virgin olive oil

juice of half a lemon

pinch of salt

lots of pepper
photo updated 10.15.13
-Combine quinoa and water in a medium pot and bring to a good simmer on medium high, stirring occasionally. Once at a simmer, cover and reduce heat to low and cook for 15 minutes. Remove from heat, and let sit covered for 10 minutes. Fluff continuously with only a fork, to cool down quicker.

-As the quinoa cooks, prep the other ingredients, starting with the dryer items first as to not muck up the cutting board before its time. 

-Place prepped ingredients in bowl, and add vinegar, oil, lemon juice, salt and pepper. Stir to combine.

-Once the quinoa is cooled, add it to the bowl and mix very well
photo updated 10.15.13

This salad is best at room temperature, but it is good cold as well. As I've mentioned, the options are endless. Leave out the cheese for a vegan dish, or use a cheese as a springboard for your version of the salad. Feta, kalamata olives, and lightly sauteed baby spinach with lots of lemon and garlic for a greek twist, or a good quality gruyere with sauteed leeks and french peas, with lentils in lieu of chickpeas for a french flair. Omit the vinegar if you're not a fan, just add more lemon juice. I adore vinegar, so I add a lot, and usually end up adding more as the salad sits in the fridge to freshen it up a bit. This dish keeps very well up to a week in the fridge, tightly covered with plastic wrap or in a tightly sealed container.
photo updated 10.15.13