Thursday, June 27, 2013

Chicken Tikka Masala and Coconut Rice with Cashews


This past week I was really in the mood for some chicken tikka masala, and set about finding a recipe that wasn't too daunting, yet still promised complex flavor. I soon discovered there were about as many ways to make this dish as there are people willing to eat it. Since Indian food isn't exactly old hat for me in my kitchen, I didn't feel comfortable winging it from just one recipe. There were things I really liked in some, but I couldn't seem to find a recipe that seemed to stand up on its own - either it was too complex, or didn't seem to have much flavor from the technique used. I realized that not many spices were necessary to have a delicious turn out, but the combination of them was key. 

In the end, this is an amalgamation of about 4 different recipes that I found interesting. I'm not including where I found them, because that would be just too confusing, as well as perhaps insulting to the creators of them. The coconut rice is something I've been working on for years, and finally stumbled upon a preferred method (at least in our house) this past year. It's very easy to riff off of by incorporating a slew of Asian, Middle Eastern, or Indian interpretations. I'm pretty aware these dishes aren't exactly 'authentic', but they were insanely good and left us with hardly any leftovers. The rice never even made it to the tupperware. 

INGREDIENTS
                                                                               

for the chicken:

2 1/2 - 3 lbs boneless, 
   skinless chicken thighs
1 cup low or whole fat plain 
   yogurt
4 cloves garlic, finely minced or
   grated
2 inch piece fresh ginger, grated
1 1/2 tsp ground cumin
1 1/2 tsp ground coriander
1 tsp kosher salt 
1 tsp coarse ground pepper

for the rice:

1 1/2 cups basmati rice, rinsed well (or not - if you don't mind sorta sticky rice, don't rinse)
1 1/2 tsp turmeric
3 large or 5 small scallions, sliced on a diagonal
1/2 - 2/3 cup raw  unsalted cashews
1 1/2 cup water
1 can full fat coconut milk 
1 tsp kosher salt
1 Tbsp canola or coconut oil
                                                                       
for the sauce:

1 28 oz can crushed tomatoes
1 medium sweet onion, finely chopped
3 Tbsp canola or coconut oil
3 cloves garlic, finely minced or grated
1/2 inch piece ginger, grated
1 jalapeno, seeded and finely minced
1 Tbsp double strength tomato paste
1 Tbsp garam masala
1 tsp coriander
1/2 tsp allspice or ground clove
2 tsp sweet curry powder
1 can full fat coconut milk
salt to taste
1/4 - 1/2 cup coarsely chopped cilantro

Mix together the yogurt and the other spices for the chicken in a large bowl. Place the chicken thighs into the yogurt mixture, ensuring that each one gets well coated. Cover with plastic wrap and keep in the refrigerator to marinate for at least one hour, or up to overnight.

Add 1 Tbsp coconut or canola oil to a medium pot and heat over medium. Pour in the rinsed (or not) rice and stir frequently till the grains are nearly opaque. Add the turmeric, scallions, cashews, water, salt and coconut milk. Stir well and crank heat to high. When rice comes to a boil, give it another thorough stir and cover, dialing heat back to low. Cook for 18 minutes, then remove from heat and let the rice continue cooking (still covered - don't remove the lid!) for 10 more minutes. Fluff with a fork before serving.

While the rice is simmering away, prepare the sauce. Add the 3 Tbsp oil to a dutch oven or large heavy bottomed pot over medium high heat. Add the onion and cook till softened, 8 - 10 minutes. Add the jalapeno and cook for a couple more minutes, stirring occasionally. Add the garlic, ginger, garam masala, coriander, allspice and curry. Stir frequently till spices start to bloom, about 30 seconds. Add the tomatoes and coconut milk. Simmer for about 10 minutes on medium low. Add cilantro and salt to taste. 

Once the rice and sauce are done, it's (finally) time to cook the chicken! Place a cooling rack on a foil or silpat lined cookie sheet, and spray the rack down well with canola oil. Turn the broiler on high, and place an oven rack in the 2nd to the top slot. Remove the chicken from the yogurt and place on rack, about an inch or 2 apart from each other. Pour the remaining yogurt marinade into the sauce and let simmer while the chicken cooks. Place the chicken under the broiler and cook on each side for about 5 minutes, until a nice char develops. Remove from oven and cut into large chunks and toss them into the sauce, as well as any pan drippings. If the chicken is a little underdone, just keep the heat on low under the sauce and leave it for a few minutes to finish cooking. 

Serve  the chicken with plenty of sauce and lots of fresh cilantro over the rice. Not in the mood for rice? Sop up the amazing sauce with some naan bread. 


Tuesday, June 25, 2013

Old Fashioned Tapioca Pudding with Black Cherry Compote

 My husband had mentioned to me once that tapioca was his favorite dessert. Since he is so hesitant to call any food item his 'favorite', I took special note of this. I had purchased a bag of small pearl tapioca a while back and was waiting for a special time to make it for him. And the reason why it had to be special, was because of the long preparation the tapioca required. Soaking the pearls overnight you say? Yeah, definitely going to be a momentous occasion to make this. Luckily for him, Father's Day was just around the corner.

This recipe may be time consuming, but if you utilize some different cooking techniques, it ends up being quite easy to prepare. After soaking the tapioca pearls overnight, you don't necessarily have to use them the next day. I did this a couple days ahead, then drained the pearls well and kept them in a well sealed container in the fridge, so they were good to go when I was ready to make the pudding. Since I didn't have a proper double boiler, I dusted off the crock pot and made use of it for the first time in I don't know how many years. Since the recipe required the tapioca to be covered and tended to quite frequently during its long cooking time, I didn't want to use my usual glass bowl on big pot technique. With a little one running around, I figured that would be begging for disaster. 

I also had a ton of cherries I wanted to use up, and a compote made from them was a lovely addition. Any stone fruit in season would work here, especially ones with a firmer flesh such as plums. A little dark rum, lemon juice and some turbinado sugar were all the coaxing they needed to release their succulent juice which turned into a wonderful syrup. I ended up with a few tablespoons of syrup left, which I indulged in late at night (after the girl and husband were asleep, of course) by pouring it over some salted caramel ice cream. Kind of an unusual combination, but it ended up being pretty spectacular. 

INGREDIENTS                                                                         


1/2 cup small pearl tapioca (I used 
Reese small pearl tapioca, as well as their recipe)
2 1/2 cups whole milk
1/4 tsp kosher salt             
3/4 cup turbinado or natural cane sugar, divided
2 large eggs, separated
1 vanilla bean, split and seeded
juice of 1/2 a lemon, ~1 1/2 Tbsp
2 Tbsp dark rum
~1 lb dark cherries

Soak the tapioca in 2 cups room temperature water in a large bowl overnight, covering the bowl with plastic wrap. Drain water and use immediately, or place in an air tight container in the fridge for up to 3 days.

Pull out your crock pot and turn the setting to high. Add the milk (and tapioca if it was in the fridge) and heat till no longer cold. Add tapioca (if using it at room temp), salt and 1/2 of the scraped out vanilla bean seeds, as well as the pod. Stir well, cover and cook for about 1  hour, to 75 minutes, stirring occasionally. Make sure that the mixture doesn't come to a simmer, and just remains hot.

Meanwhile, pit the cherries and place them into a medium pot. Add the other 1/2 of the vanilla bean seeds with the pod, rum, lemon juice and 1/4 cup of sugar. Turn the heat to medium low and stir well. Once the mixture starts to bubble, reduce heat to low and stir occasionally for 1 hour. Place the cherries into a heat resistant glass bowl and set aside. Quickly clean out the pot and place it back on the stove for the tapioca.

Separate the eggs, and place the yolks in a small bowl with 1/2 cup of sugar. Whisk well until it turns a pale yellow. This takes some time, since there isn't much liquid to get the sugar incorporated quickly, but be patient - it does happen. Empty the hot tapioca mixture into the medium pot on the stove set on medium low heat. Temper the yolks with a couple ladles of the hot tapioca mixture. Pour the tempered yolks back into the tapioca mixture and raise heat to medium. Stir constantly till the mixture thickens considerably, about 10 - 15 minutes. Turn off the heat.

Whisk the egg whites until stiff - I'm talking meringue stiff. Gently fold them into the tapioca. Initially I was a little put off by the resulting texture from this, but trust me, its divine. The size of the tapioca pearls in contrast to the egg white feels amazing. 

You can serve this immediately, or wait for it to cool down a bit and pop it in the fridge till it's nice and cold. Ladle the creamy pudding into a bowl with a couple spoonfuls of the cherry compote and enjoy a truly old fashioned dessert.

Recipe adapted from Reese brand's small pearl tapioca (it's on the back of the bag!)


Friday, June 21, 2013

Soba Noodles with Tehina and Cremini Mushrooms

My daughter and I are definitely noodle junkies, following a long line of them from my dad's side of the family. Soba is a new favorite in the house, since its just different enough texturally and in flavor to inspire a whole new cache of tasty combinations. This one is very quick, and I since I was low on ingredients, forced me to get a little creative. I'd mistakenly picked up a jar of tehina (a popular mid-east condiment) instead of tahini, and wasn't too sure what to do with it. It had tahini in it, as well as chickpeas, garlic, and lemon. Well, it helped contribute to a wonderful 'sauce' that coats the noodles just enough and doesn't overpower them. What you end up with is an interesting mix of flavors; Asian and Mediterranean riffing off each other. 
This cooks up super quick and with very little effort. A perfect meal for an impatiently hungry toddler- hence, the shortage of photos this time. She wanted to eat it now. Needless to say, she loved it and even ate the scallions (after I mixed them in well with the rest of the noodles). Apparently noodles are the ultimate vessel for new ingredients in our home, and I'll be using them to try out beets again on her... I'm very determined to get her to eat them in one form or another. Even if it takes years. 

INGREDIENTS

1 8 oz package soba noodles
1/2 lb firm tofu, cut into 1/2 inch thick cubes
6 - 8 oz cremini mushrooms, sliced
3 scallions, sliced on the bias
1 Tbsp canola oil
1/3 cup tehina
2 tsp toasted sesame oil
1 - 2 tsp seasoned rice wine vinegar
1 tsp - 1 Tbsp sriracha, depending on taste
2 Tbsp Bragg's liquid amino's or tamari

Place a large pot of water on the stove and crank the heat to boil. Place a saucepan over medium high and add canola oil. Once the oil is nice and hot, add the mushrooms and tofu. Stir occasionally till the tofu gets a little crust going, and the mushrooms have released all their liquid and it has evaporated, about 8 to 10 minutes.

Once the water is boiling, add the soba and cook 1 minute less than instructed on the package. Meanwhile, combine the tehina, sesame oil, rice wine vinegar, sriarcha and Bragg's in a small bowl. Pour the sauce over the cooked tofu and mushrooms. Drain the soba and add it to the pan, mixing well to coat it in the sauce. Serve immediately with scallions as a garnish.


Saturday, June 15, 2013

Blueberry Flax Pancakes with Caramelized Bananas

It seems that every food blogger has got their quintessential pancake post, so I figured now is as good a time as any to throw mine into the ring. There is a saturation of them out there, which kept me from posting my favorite pancakes for a bit, but then I resigned to the fact that it's because people love pancakes, and the more options, the better. 

Blueberry and banana has long been one of my favorite fruit combinations. By adding  brown sugar and bumping up the nutritional value by adding a bit of flax meal, slightly curbs the guilt I feel when eating these. Because they are some rich pancakes - you don't even need to add butter! 
I've tried tons of pancake recipes over the years, and I think this one is my favorite... for now. Marion Cunningham's buttermilk pancake was a true workhorse for me for a long time, but Lucian K. Truscott IV's rendition (yep, IV) may have permanently replaced it. For one thing, it calls for milk, not buttermilk. I don't know about most people, but the only reason I ever bought buttermilk was to make pancakes. And the rest of it would usually spoil by the time I felt up to making them again. You can use buttermilk instead, which I've tried once, but I do prefer regular milk here.


INGREDIENTS

2 eggs
1 cup whole milk or buttermilk
2 Tbsp vegetable oil
6 Tbsp unsalted butter,  3 of which need to be melted and slightly cooled 
1 cup AP flour
1/4 cup flax meal (you can grind up some flax seed in a spice grinder - same thing)
3 tsp baking powder
3 tsp sugar
1/2 tsp kosher salt
1 pint fresh blueberries
2 - 3 medium to large bananas
1/4 cup packed light brown sugar
pinch of cinnamon (~1/8 tsp)

Preheat oven to 200* and place a baking sheet on the middle rack. In a large bowl, beat the eggs until light and foamy. Stir in milk, oil and butter. In another bowl, sift together the dry ingredients. You'll have some of the flax seed casings left over - go ahead and dump them in. Gently whisk dry ingredients into the wet until just combined. Lumps are okay.

Place a nonstick griddle or pan over medium heat. Let the batter rest for a few minutes while the pan heats up. The trick to not having a crummy first batch of pancakes is only in having the pan hot enough. Pour in about 1/4 cup of batter for each pancake. Top each pancake with a handful of blueberries. Flip when bubbles are bursting on the top of the cakes and the edges look dry. Continue cooking for about another minute. Place pancakes in oven to keep warm, or serve them immediately for any impatient eaters. But they'll have to wait to have them with the warm, gooey, caramelized bananas.

In the same pan you cooked the pancakes, dial the heat back to low and add the brown sugar and remaining butter. Slice the bananas lengthwise, then half them (or cut into thirds if you have very large ones). Place cut side down in the pan and sprinkle with the cinnamon. Raise heat to medium low and cook for about 3 minutes a side, moving them around in the pan to keep the sugar from burning. Top the pancakes with bananas and melted butter/brown sugar from pan. Add a touch of maple syrup if you want to be really decadent. 

This recipe is an adaptation of of Lucian Truscott IV's Mississippi Pancakes and Haydee's Bananas from his article "With Pancakes, Every Day Is Sunday" from the New York Times.

Thursday, June 13, 2013

Spanakopita

I've been craving this dish for a while, and was actually having some trouble finding a recipe that I wanted to try. Most were spanakopita pockets, triangles, or used kale or collards instead of spinach. Although I didn't look too hard, I didn't come across the traditional recipe I was looking for. So I ended up just using the flavors that were in some of my favorite spanakopitas I've had in the past.
Growing up in the Chicagoland area, I've been to my fair share of Greek restaurants, and have had many, many versions of this dish. To no surprise, there wasn't much variation, which I never had any problems with. I did mix things up slightly by using 2 kinds of feta, which added a little diversity in flavor and texture, while keeping it from being too salty, since the French style feta is creamier and not as salty as the Greek. Lots of lemon zest and fresh dill kept this dish from tasting too heavy or one note. This is very easy to make, yet a bit on the labor intensive side. Definitely a weekend thing, but it makes so much you'll get to enjoy it for the rest of the week. It does taste the best the first day, when the phyllo is crisp and crackly. The best way to reheat this is in a toaster oven, since that freshens up the integrity of the crust. But if you don't mind not having a crunchy crust, nuking it is just fine. There is lots of butter used, so even if the texture isn't there, the flavor was so good I didn't mind giving up the crispness.

INGREDIENTS                                                                 

2 lbs frozen organic spinach, thawed and with most 
   of the moisture squeezed out
2 Tbsp olive oil
1 medium onion, finely diced
~6-8 oz Greek feta
~6-8 oz French sheep's milk feta
1 egg, lightly beaten
zest of 1 organic lemon
1/4 tsp freshly grated nutmeg
1 clove garlic, minced
1/2 cup lightly chopped fresh dill, or 2 Tbsp dry
salt and pepper
1 16 oz package frozen phyllo dough, thawed    
   overnight in fridge
12 Tbsp melted and cooled butter or extra-virgin   
   olive oil spray (I prefer the taste and richness
   that butter provides, but I've also used a 
   combination of the two in the same dish)

In a large saute pan, heat olive oil over medium heat. Add the onion and saute, stirring often till translucent; about 6 - 8 minutes. Add the squeezed out spinach and cook for another 6 - 8 minutes. Season lightly with salt and pepper. Transfer the cooked spinach to a large bowl to cool.

Melt the butter. Add the garlic, nutmeg, lemon zest, and dill to the beaten egg and mix well. Once the spinach is cooled down to nearly room temp, add the egg to it and mix very well. Crumble in the 2 fetas and mix well. 

Preheat oven to 350*. Generously butter (or spray) a 9 - 13 (or there about) dish. Open one of the packages of phyllo, leaving the other in the fridge. Lay down a sheet of wax or parchment paper and unroll the phyllo onto it, immediately covering it with a clean kitchen towel. Lay down one sheet of phyllo and spatter the butter over it with a pastry brush, then gently brush the butter evenly over the bottom and edges (or spray evenly with oil). After each sheet of phyllo is removed from the stack, immediately cover with the towel. Repeat this process till you have 12-15 layers of phyllo*. If the dough splits or cracks as you work, pay no mind. There are so many layers that it doesn't make a difference.

 Add 1/3 of the spinach mixture, then top with 5 more layers of phyllo, ensuring to butter/oil in between each layer of dough. If you've used up your first roll of dough by this point, remove the other roll of phyllo from the fridge and lay it out in the same manner, ensuring it is covered after every sheet you use. Repeat this till all the spinach is layered. Top the last of the spinach with 15 sheets of phyllo*, with butter or oil spread evenly between each sheet. Top with the remaining butter/oil, then score the top with a very sharp knife into the size of slices you will want, ensuring you go through nearly all the top layers of phyllo. Do not skip this step - I forgot to do this the first round of making it, and when I cut into it the phyllo cracked apart so badly the top crust was almost completely shattered.

Ensure an oven rack is placed in the center of the oven, and pop in your beautiful spinach pie that you worked so hard on. Bake for ~60 minutes, or until top is golden brown. Allow to cool for at least 20 minutes before slicing and serving.

*By the time I hit about 10 sheets of phyllo, I started to get a bit ornery. If you have the gusto, by all means, use 15; it really makes for a flavorful and crackly crunchy crust. But if you don't have it in you, and don't mind tossing some of the leftover phyllo, layering the minimum 10 works great too.

Monday, June 10, 2013

Savory Mini Cheesecakes

These cheesecakes are kind of a cross between a cheesecake and a souffle. They have a wonderfully textured interior, and just enough crumb on the outside to hold it together. You can really get creative with the cheese you decide on incorporating into the batter, as well as what you serve them with. I was in a traditional mood when I made them, so I followed what the recipe recommended and used Roquefort. 


This recipe is from Jacques Pépin's More Fast Food My Way, which I love. I made a few adaptations since I didn't have a couple of the ingredients on hand, but they were still very good. I do recommend having company when you serve these, or you'll probably end up eating them all yourself. I had made these on my day off for my husband and I while the little one was napping. We housed 2 a piece. Then when little one woke up, she came into the kitchen, sniffing the air, saying 'num num!' I did feel a little guilty. But babies don't really like Roquefort, right?

INGREDIENTS                                                             

2 tsp unsalted butter, softened
4 Tbsp panko style bread crumbs
1 8 oz container whipped cream cheese,
   at room temperature
2 large eggs at room temperature
1/4 cup greek yogurt
1/2 tsp kosher salt
1/2 tsp freshly ground black pepper
1/3 cup crumbled blue cheese (I used Roquefort this time, but any fav crumbly cheese is good)                                                       

for the salad:
3 - 4 cups butter lettuce, or another tender,
   crunchy variety
1 scant Tbsp red wine vinegar
1 tsp dijon mustard
1/4 cup extra-virgin olive oil
1 pear, ripe yet still quite firm, sliced
salt and pepper to taste

Preheat oven to 350*. Coat 4 ramekins with the softened butter. Divide the panko into each mold and turn the ramekins at an angle to coat all sides. 

Whisk the cream cheese, eggs, greek yogurt, salt and pepper very well in a medium bowl. Divide evenly among the ramekins and sprinkle the blue cheese on top of each one. Place on a baking sheet and bake for about 20 minutes. Keep an eye on them - depending on the size and shape of your ramekins, it may be a shorter or longer bake time. 

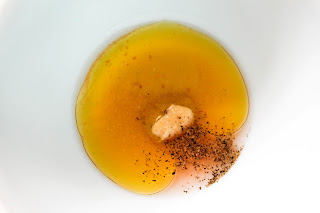
Meanwhile, whisk together the vinegar, mustard, oil, salt and pepper in a small bowl. Set aside and slice the pear. Arrange the lettuce on the plates, making a little 'bed' for the cheesecake. Place the sliced pear on top of the leaves and drizzle with the vinaigrette. 

Once the cheesecakes are done (they should still look slightly wet and soft in the center, yet set), let them cool on the baking sheet for about 10 minutes. Run a sharp paring knife around the edge of the cakes to loosen them from the ramekins. Invert each one into your hand, turn back up right and place on a prepared lettuce bed. Serve immediately.


This recipe has been adapted from More Fast Food My Way by Jacques Pépin

Wednesday, June 5, 2013

Best Pot Roast

 As I get older, there are some things that seem so tried and true, that they can't possibly be improved upon. Dark black English tea, opaque with milk and perfectly sweetened, reminds me of my mother making tea for me and her when I was a kid, and she made it wholly perfect by serving it in her miniature Blue Willow china tea set. The peanut butter and butter sandwiches my paternal grandmother made on soft processed white bread, sans crust of course. A big pot of white rice that my dad would melt gobs of butter into, then stir in lots of dark soy sauce. And noodles. My father's side of the family has a deep love for egg noodles, served simply with lots of butter, and maybe some Parmesan cheese to fancify it a bit. 

This pot roast recipe touches on many of my childhood food memories, and blows them up into something really special. It is very simple, yet makes a gravy so delicious you'll want to have a side of it in a small cup to sip between bites. At least I do. My husband is a die hard mashed potato fanatic, yet even he gets a little weak in the knees for egg noodles heavily swathed in this gravy. Don't be alarmed, but there is a bit of processed canned soup in this gravy. That is what makes it so good. With a little doctoring up, it makes something that tastes far from processed.

This pot roast is an amalgamation of my mother and cousin Kris's renditions of their favorite pot roast. My mother grew up with simple pot roast, prepared in a pressure cooker, with a super caramelized bottom that her and her sister still fight over. Kris's is a slow cooker version, that cooks the roast in almost an entirely opposite fashion for hours in a crock pot, with a couple cans of cream soup. Over one sister's weekend we had a pot roast feast, where my mother and cousins (the sisters I grew up thinking were fraternal twins, yet are actually a couple years apart) each made their fav pot roast. Lisa made 'stringy beef', in which the pot roast cooks all day in a very low oven till it pretty much falls apart if you look at it too long. They are all wonderful pot roasts, but the winner seemed to be Kris's, mainly because of the gravy it made. It had won us all over. The pressure cooker technique made a fabulous roast as well, but was missing that ridiculous gravy. So I thought I'd combine the two.

My mother, knowing my incredible fondness for her pot roast, bought me a pressure cooker one year for my birthday. I call it my pot roast cooker, since I have yet to cook something else in it. You can definitely prepare this in a slow cooker as well* - the ingredients are the same, just the cooking time differs. The texture and flavor of the roast will be pretty different, though. The slow cooker version doesn't have as an intense, beefy flavor, but it's still really good. And I will only eat it with lots of lightly buttered egg noodles, though feel free to sub in your mashed potatoes.


INGREDIENTS

2.5 - 3 lb chuck beef roast
1 Tbsp canola oil
1 can cream of cheddar soup
1 can cream of chicken soup
1 huge onion, peeled and quartered
2 bay leaves
2.5 - 3.5 soup cans of water, or enough to cover
   the roast, whether you use a pressure cooker
   or crock pot
salt
2 tsp good English mustard, dry or prepared
2 tsp sweet paprika
2 tsp nutritional yeast (optional)
lots of black pepper
pinch cayenne pepper
1 tsp rubbed sage
water (you may need a touch to thin out the gravy)

Place a pressure cooker over medium high heat. Salt and pepper both sides of roast. Add oil to the pot and slide in roast. Cook for 6 minutes on first side, or until there is a deeply caramelized crust. Flip the roast (you'll probably need 2 utensils used simultaneously for this) and add the onion, both cans of soup, bay leaves, and water. Gently lift edges of pot roast to let liquid get underneath. Cover, switch pressure to high (number 2 on my pot) and raise heat to high. Once the pressure cooker starts hissing out a steady stream of steam, start your timer for 45 minutes for a 2.5 roast, or 60 for a 3 lb roast. 

Once the timer goes off (or several minutes before), you'll want to pay special attention to the smell of the steam. It should have a very heady beef smell, and smell almost burnt. I know this can seem a bit scary, but I really don't have a better way to describe it. I learned it along the way - and keep in mind I've never had a bad pot roast from making it in the pressure cooker, I just know that some have been better than others. That almost burnt smell is what you're looking for. Once that aroma is achieved, turn off the heat and let the cooker de-pressureize. This only takes a few minutes - consult the manufacturer's instructions on the various ways you can do this. Once the knob is at the lowest setting and the stopper depresses, it's safe to open the cooker. Remove the pot roast and set aside. 

Add the mustard, paprika, yeast, black and cayenne peppers, and sage. Here is the time to get the gravy to your desired thickness - too heavy, add a bit of water. Too thin, sprinkle in some Wondra flour in gradual increments till you get the viscosity you want. I like to blitz my gravy a bit with an immersion blender here to get the spices fully incorporated, but I've also found that a whisk works nicely at dissolving the nearly disintegrated onions into the gravy. Cook over medium low for about 5 - 10 minutes, tasting often along the way to adjust seasoning.

I love this roast with carrots, and these are my family's favorite. They also cook on the stove top. Once your timer has clicked down to 30 minutes, start preparing the carrots.

INGREDIENTS

2 lb carrots, scrubbed, peeled, and sliced 1/4 inch thick on a diagonal
~1 cup low sodium vegetable stock
1 tsp salt
2 tsp sugar
pinch curry powder
2 Tbsp butter
1 Tbsp canola oil
2 Tbsp honey
pepper

Place a large saute pan over medium heat and add the butter and oil. Once the butter is melted, add the carrots, salt, sugar, veggie stock, and curry. Stir well and cover. Cook for about 20 minutes, or until the carrots are tender yet not falling apart, stirring every few minutes. You'll need to add a bit more stock if the pan starts to get dry before the carrots are done. You will want a bit of liquid left in the pan once they are. For the last couple of minutes of cooking time, remove the lid and add the honey. Stir well until a slightly thickened glaze emerges.

for the noodles...

During the last 20 minutes on your pot roast's cooking time, make the noodles. I prefer No Yolks brand egg noodles, since they have no cholesterol and a lighter texture. I know, it's like getting a diet coke with your cheeseburger and fries. But I mainly do it for the flavor. Cook the noodles according to the package directions. Once drained, add 2 Tbsp butter and mix well. 

This recipe feeds a crowd, or a small family for a week. If you start to tire of it, after a few days in the fridge you should place it in its airtight container into the freezer. Keeps well for up to a month. I recommend adding some gravy to nearly cover the beef before storing it (in order to keep it from getting a bit dry), fridge or freezer. The remaining gravy should be stored in a separate air tight container.

*Crock pot version. Heat a large pan over medium high with a Tbsp of oil. Salt and pepper both sides of the roast and brown well on all sides. Place into crock pot. Add onion, canned soups, bay leaves, and enough water to reach the top of the roast. Cook on low for 6 - 8 hours, depending on the size of your roast. You'll know when it's done when you attempt to pick it up, and it falls apart. 

Once the roast is done, remove it from the slow cooker and set aside. Empty the remaining contents of the vessel to a medium pot and prepare the gravy as instructed above. 

Sunday, June 2, 2013

Warm French Lentil Salad

The French Le Puy lentil is my favorite variety of lentils I've tried. They are more petite and firmer than the others I've had, mainly in Middle Eastern cooking. They hold their shape wonderfully, and cook up pretty quickly, with hardly any prepping. Yet it is always important to pick over any type of lentil you're using to ensure there are no rocks or unfavorable bits before adding them to a pot. That is the only slightly laborious part of this recipe. 
I've adapted this from Ina Garten's recipe, and definitely took a bit of caution when preparing it for the first time since her original instructions call for an abhorrent amount of salt. Other than adjusting the mustardy dressing for the lentils as well as the cooking time for the carrots and leeks, that was about as far as the tweaking went. The simple brilliance of this dish is the cooking of the lentils. Some of the ingredients I was a bit hesitant on using together, actually combine so amicably with each other. An onion studded with cloves? Turnip? Definitely. They cannot be omitted or substituted - they are the key to this dish's unique and subtle flavors.
While draining the lentils, you will be comfortably swathed in the warm spicy steam that is gently scented with clove and onion. The turnip is removed after cooking as well, and is one of those ingredients that I don't think I can truly identify in this dish, yet would certainly know if it was missing. The dijon laden dressing works so well with the lentils - its really kind of extraordinary. I've never actually served this as a side dish, even though I realize they are intended to be. They've never made it that far. I usually share half the batch with my daughter on the first day, and finish it off the next. When I develop a taste for this dish, I can't be satisfied with any thing else, so why try? Yet I suspect it would be amazing with a simple roast chicken, or firm fish. Or just with some crusty bread.

INGREDIENTS

1 cup Le Puy lentils, picked over
1 leek, cleaned well with dark green bit removed.
   1/4 inch slices
1 large or 2 small carrots, peeled. Quarter then cut  
   into 1/4 inch slices
1 small to medium onion, kept whole and peeled, 
   and stuck with 5 whole cloves
1 small to medium turnip, peeled and halved
1 garlic clove, peeled and minced fine
1/2 Tbsp unsalted butter (optional)
~1/4 cup extra virgin olive oil, plus a good glug
   for the pan
~1 generous Tbsp good dijon mustard
~2 healthy pinches salt
several turns of the pepper mill
2 - 5 tsp red wine vinegar (or 1 to 3 good splashes)

the measurements for the dressing are just a guideline - you may prefer more or less of any of the ingredients. I've never made it the same way twice, since tastes occasionally vary.

Place the lentils, clove studded onion, and turnip into a medium sauce pan. Cover with cold water (the amount varies as does the size of pans - roughly 4 cups should usually do it).
Place over medium high heat and bring to a strong simmer. Reduce heat to low and cook uncovered, stirring occasionally for about 20 minutes. It doesn't hurt to check your lentils a bit before the suggested time, since the cooking time for them is always slightly different. They should be tender, yet firm.

Meanwhile, add a glug of oil to a medium skillet and saute the leek and carrot over medium heat till softened, about 15 - 18 minutes. About a minute before shutting off the heat, add the minced garlic and ensure it is thoroughly combined with the vegetables. 

Place the dollop of dijon in the bowl you plan on serving the lentils. Add the salt, pepper, and vinegar. Slowly drizzle in the oil while whisking vigorously. Adjust ingredients to taste if needed. 

Once the lentils are done, remove the onion and turnip. Drain well. Add the lentils, carrots and leek to the bowl, along with the pat of butter if you like a little extra richness. Stir till all ingredients are well combined. This dish is best served immediately, or warm.


recipe adapted from Barefoot Contessa's How Easy is That? 2010