Showing posts with label entree. Show all posts

Friday, November 22, 2013

Hot and Sour Soup

Hot and Sour Soup has been one of my almost favorite things for years. I love love love tangy dishes, especially when that tang comes from copious amounts of vinegar or citrus. Plus, this soup has a lot of the flavors I love in Chinese cooking - lots of porky goodness, warm nutty toasted sesame oil, a good kick of heat, and the firm tofu that aids in rounding out some of these intense flavors. What was keeping me from truly embracing it was the texture. You know what I'm talking about here - that thick, gloopy broth that isn't so different from what runs out of my nose during allergy season? Yeah, not appetizing. 

Surprisingly, lots of recipes online call for the addition of a corn starch slurry to be added to the soup to achieve that undesirable viscosity, so apparently there are those of you out there that enjoy it. Me, not so much. When I stumbled across this gem, I knew it was a keeper. It has been on repeat in our house for quite a while now, mainly because it comes together super fast and nearly all the ingredients are things you probably already have in your fridge and pantry. 

I usually try not to get too nostalgic about my food memories, but I feel an urge to for this post. When I tasted this version of hot and sour soup, I immediately remembered the first time I had egg drop soup that wasn't prepared in a Chinese restaurant's kitchen. A high school girlfriend invited me over for dinner one night at her parent's house, and I gladly accepted, without knowing of the amazing treats that lay ahead of me. Her mom's egg drop soup was divine; homemade chicken stock, perfectly cooked ribbons of egg, a subtle hint of lemon, and none of that slippery, goopy texture. I never knew it could be that good. This recipe reminds me a lot of that - simple, yet packed with flavor and super comforting, something a friend's mom or grandma would make. I was 16 at the time, and I still remember that entire meal. Along side the soup, we had bean sprouts quickly sauteed with soy and butter, perfectly cooked rice, and fried spring rolls. Heaven. 

I didn't make any alterations to this recipe, since I think it's pretty much perfect already, but there is of course room to make it more sour or spicy to suit your tastes. I've been reading cookbooks a little obsessively lately, and this little gem was from Flour, Too by Joanne Chang. Seriously, check it out - it is full of amazing goodies, and lots of sweets, which I need to start making more sparingly... it's been like Christmas here with all the cookies, brownies, cakes, etc that I've had around. I can't remember the last time I didn't eat at least 2 cookies in a day. But enough of my new baking/eating my baking addiction. 

INGREDIENTS


2 Tbsp vegetable oil
1 garlic clove, minced
1 Tbsp fresh ginger, peeled and minced
4 scallions, sliced thin, plus
   more for garnish
1/2 lb ground pork*
4 cups low sodium chicken broth
1 lb firm tofu, cut into 1/2 inch cubes
4 - 5 button mushrooms, cleaned and
   thinly sliced
1 tsp sugar
2/3 cup rice vinegar, plus
   more to taste
3 Tbsp soy sauce
1 tsp freshly ground black pepper
1 Tbsp toasted sesame oil
1 Tbsp sriracha, plus more to taste
2 large eggs, lightly beaten

Prep all your ingredients before you even set your pot over the heat, since this soup comes together super fast. You can use pre-ground pork from the supermarket, or *grind your own, which is what I prefer. Simply take a pork tenderloin or some boneless chops and cut them into smaller hunks that your food processor can handle, and place them on a plate. Put the pork in the freezer for 20 minutes to firm up a touch so when you process it, it doesn't get all gummy on you. Once the pork is slightly firmed up from the freezer, toss it in 1/2 pound increments into your food processor and give 5 - 7 1 second pulses. Set aside the 1/2 pound needed for the soup and refrigerate or freeze what remains. You'll now have delicious ground pork with no mystery cuts and much less fat than what you'd get at the grocer. 

Place a large saucepan over medium high heat and add the vegetable oil. Add the ground pork, ginger, garlic and scallions, stirring occasionally for ~1 minute. Break up the pork a bit with your spoon, but don't fret about getting into fine pieces - some variation in its texture is very welcome in this soup. When it gets to about this point, you'll want to add the stock:
Dial up the heat and cover to bring the soup to a simmer, which should take a couple of minutes. Add the the remaining ingredients except the eggs, and cook uncovered till it comes to a simmer. Once there, start swirling the soup with a fork while you slowly pour in the beaten eggs. Serve immediately with a touch more sesame oil, scallion greens for garnish, and rice vinegar and sriracha at the ready if you want a bit more bite to your soup.

Recipe for 'Mama Chang's Hot and Sour Soup' from Joanne Chang's Flour, Too

Friday, November 8, 2013

Orzo and Lentil Salad with Dill

The first time I had this salad was years ago at a friend's annual labor day party, and everyone loved it so much that it now makes an appearance every year. It's a very simple salad with not many ingredients, so it's kind of vital to use the best you can afford/get your hands on. The flavors mingle together really well, yet still manage to be prominent enough to taste every nuance. So, get the best olives, preferably with the pits (it is cumbersome to pit them yourself, but it'll be worth it since the texture between pitted and not is night and day), the best french goat's milk feta, and some really special extra virgin olive oil. The salad isn't swimming in oil, yet there is enough to keep the ingredients flowing and not clumped up.

A small disclaimer, I am aware that this recipe comes from a James Beard cookbook full of different kinds of salads... or is it pasta dishes... not really sure, it's been a while since I've perused it. I've never referenced the recipe myself when making this dish, since I simply go with the ratios of ingredients that suits my taste. I may be forgetting some, or including things that were never in the original salad I tasted. It's really no matter, because as long as you use high quality ingredients here, whatever ratio of them you prefer, it will be pretty delicious to you too.

INGREDIENTS

1 1/2 cup uncooked orzo pasta
heaping 1/2 cup dried lentils
~1 cup kalmatta or favorite olive,
   pitted and finely chopped
4 - 6 ounces feta, crumbled
1/3 cup good quality extra virgin
   olive oil
~1/2 cup dill, lightly packed and 
   coarsely chopped
1 small lemon, juiced
several splashes red wine 
   vinegar (optional)
sea or kosher salt
freshly ground pepper


Set a large pot of salted water on the stove to boil for the pasta. Meanwhile, spread out the lentils in an even layer and check them over for any non-lentil debris. Place the lentils in a medium sauce pan with 2 cups cold water. Cover and turn heat up to medium high, and give them a good stir after a few minutes. Once they come to a boil, dial heat down to medium low and cook for 20 minutes (still covered), or until they are tender yet not mushy, stirring occasionally. Drain any remaining water from the lentils, and set aside. 

Once the water is at a boil, dump in the orzo and cook till al dente. Drain the pasta and immediately rinse in cold water and drain thoroughly. While the pasta is cooking, prep all other ingredients and place in a large bowl, preferably one you don't mind serving in. Add the cooked orzo and lentils with a couple pinches of salt and lots of turns of pepper. Toss well and adjust seasoning if needed. This is where I like to add some red wine vinegar, or more lemon juice if that is more your thing. Either way, the orzo and lentils really soak up the seasonings. The earthiness of the lentils can really hold up to some aggressive seasonings, but don't be tempted to add too much acid or salt, since too much of either can thoroughly offset the balance of flavors you want to achieve. 


This salad can be served room temperature, but I think it tastes the best after sitting in the fridge over night so the flavors can really meld. Serve with a few more sprigs of dill and a good drizzle of olive oil. This is great as a side, but I love a big bowl of it for a totally filling lunch.

Tuesday, October 22, 2013

Sunday Dinner Volume II

Now that the colder weather is steadily becoming more frequent, I start whipping out Sunday dinner type meals more often. When it's in the 30s outside with the sun 'taking a nap' as my daughter likes to put it, there is nothing more comforting than having a pork roast slowly roasting in the oven, with a couple of pots on the stove top simmering away. 

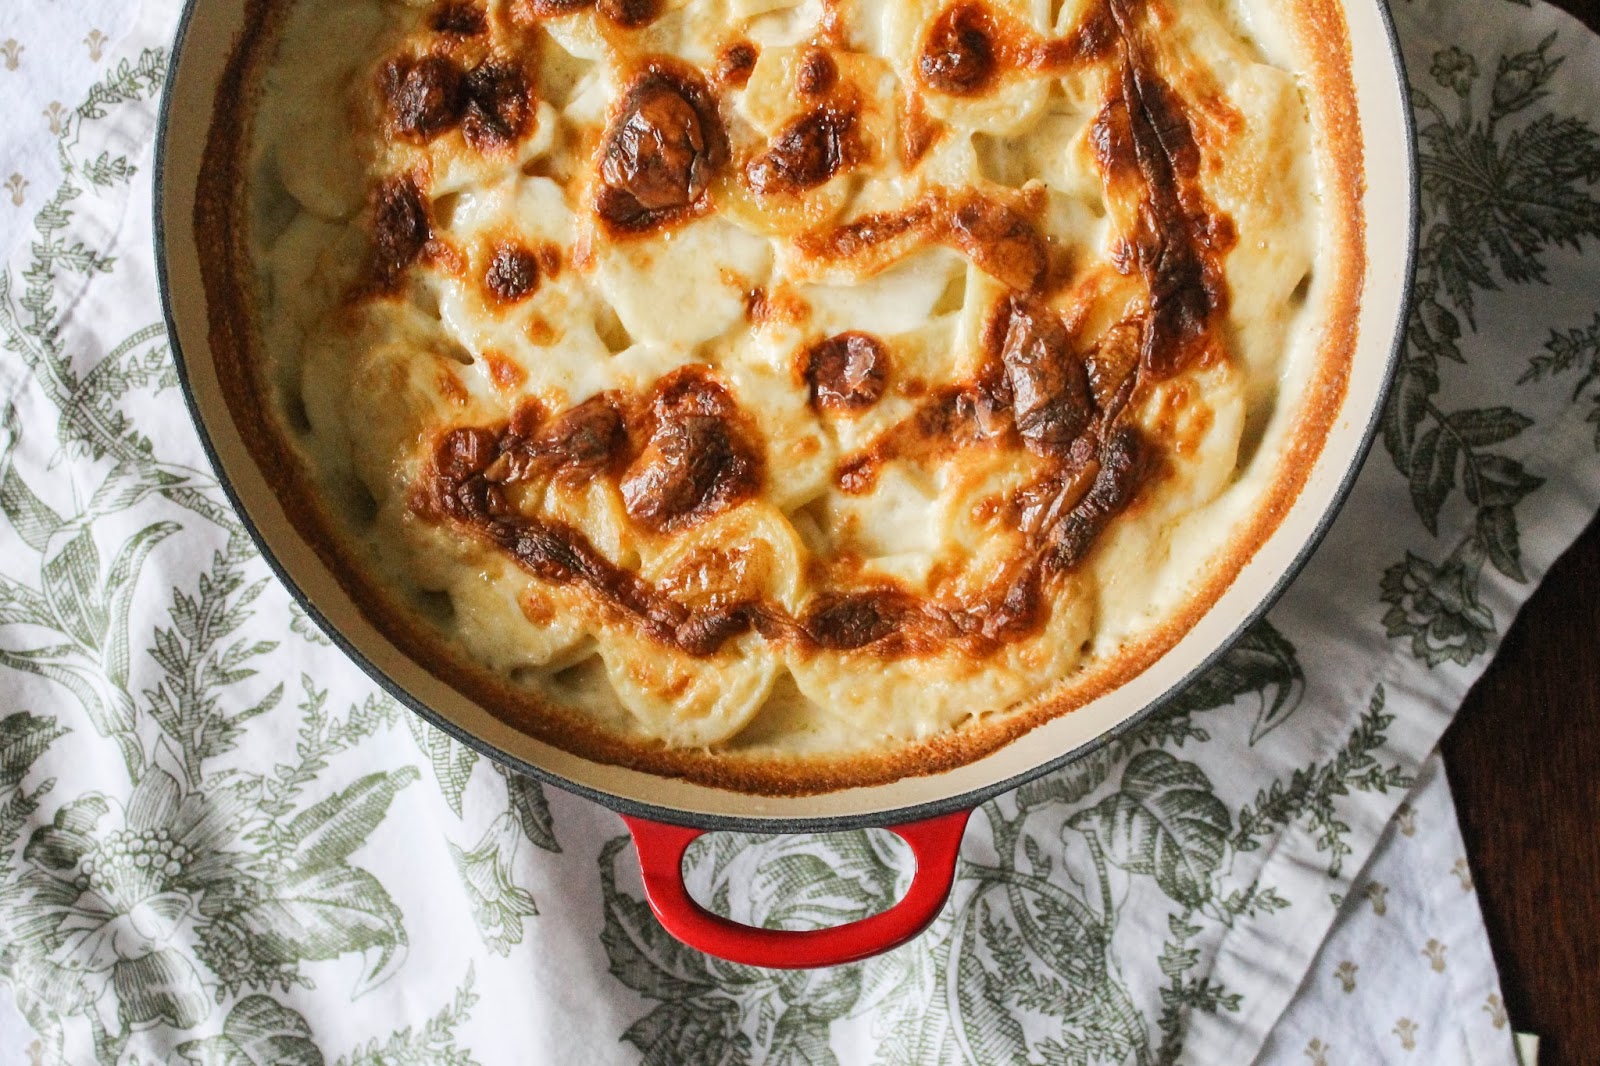
The main reason I had to come up with a good old fashioned family dinner was because I had a yen for dauphinoise potatoes. Not a dish that cozies up quite the same to a ham sandwich (well, maybe when eaten cold the following day- very good, by the way) or a bowl of chili. I love chicken with this, but wanted to use a pork roast so I could have plenty of left overs to go with some super yummy ramen broth I'd been saving in the freezer. Which is why I kept the seasoning of the roast itself pretty simple, and chose the 'wow' factor to come from the groan inducing sherry cream sauce. This sauce is so good, if I could get away with it I'd make extra and serve it in little demitasse cups along the side. Good gravies and sauces are so well loved on my side of the family, that we don't think it is wrong in any way to straight up imbibe them. 

All of these recipes are very simple and can be made with complete ease as long as you have enough time. That is the beauty of a good Sunday dinner - a tiny bit of prep, and then relax on the couch while you enjoy all the luxuriant smells coming out of the kitchen. And, the leftovers. So good, and so many things you can do with them. For example, eating the dauphinoise potatoes cold, straight from the fridge. 
There are lots of dauphinoise potato recipes out there, but my favorite is Jacque Pépin's simple tried and true version. No cheese here folks, and you will not miss it. Not even a little. The aromas that flood your home as these bake in the oven are divine, and my daughter who is a devout potato hater, (even french fries sometimes) gobbled these up without a trace of encouragement. 

INGREDIENTS

for the brined pork roast and sherry cream sauce

1 2 - 3 lb boneless pork loin roast, any silver skin removed
2 quarts cold water
4 garlic cloves, peeled and smashed
12 - 15 pepper corns
1 bay leaf
1/4 cup sugar
1/4 cup table salt or ~1/2 cup kosher, depending on brand
1 Tbsp canola oil

1/3 cup dry sherry
1 shallot, minced
1 garlic clove, thinly sliced
1/2 cup heavy cream + 1/4 cup whole milk, or 3/4 cup half and half
1 - 2 tsp apple cider vinegar
salt and pepper to taste

Place all ingredients except the pork roast in a large pot with a lid. Mix well with a wooden spoon till all the sugar and salt is dissolved. Add the roast, cover, and place in the fridge for 1 to 2 hours, depending on the size of your roast. 

Preheat oven to 375*. Remove roast from the brine and thoroughly dry it off with paper towel. Add the canola oil to an oven safe pan and place over medium high heat. Sear all sides of the roast to golden brown. Place in the oven and roast till internal temp reaches 135*, about 45 minutes to 1 hour 15 minutes, depending on size of roast.

Remove from oven and let rest on a cutting board for at least 15 minutes before slicing. 

Meanwhile, place the pan that the pork cooked in back over medium low heat. Add a touch of canola oil and the shallot. Saute for a couple minutes, then add the garlic and cook for another minute or so. De-glaze the pan with the sherry, scraping up all the brown bits and let reduce by nearly half. Add the cream and milk and bring to a simmer, then reduce heat to low and let simmer for 3 - 5 minutes to let it thicken, stirring often. Stir in the apple cider vinegar, then taste for seasoning. Add any pork juices that have accumulated on the cutting board and stir them in. Since the roast is brined, the pan juices will be quite salty, so it's best to wait till the end to season the sauce if needed. 

Slice into half inch thick pieces and adorn with copious amounts of sherry cream sauce.

for the dauphinoise potatoes

1 3/4 lb potatoes, peeled (I used red bliss, but 
   Jacques recommends yukon gold)
2 1/2 cups whole milk
3 garlic cloves, minced
scant tsp kosher salt
1/2 tsp ground black pepper
1/8 tsp freshly ground nutmeg
1 cup heavy cream
1 Tbsp unsalted butter, softened

Preheat oven to 375*. Combine the milk, garlic, salt, nutmeg and pepper in a large sauce pan. Slice the potatoes 1/8 inch thick and add them to the pan as you go to ensure they don't get discolored.

Butter a large (at least 6 quart) baking dish with the softened Tbsp of butter.

Turn the heat on to medium high and bring the mixture to a gentle boil, stirring often to prevent the slices of potato from sticking to one another.

Once it reaches a boil, add the ingredients to the buttered dish and spread them out evenly. Add the heavy cream. Bake on a baking sheet (just to be on the safe side) for up to one hour, or until most of the liquid is absorbed and the potatoes are easily pierced with a knife. Let the dish stand, covered, for 20 - 30 minutes before serving to allow it to completely set. 
I was in the mood for petit pois with pearl onions swimming in butter for this meal, but endive with mushrooms and peas would probably go even better. 

Dauphinoise Potatoes slightly adapted from Jacques Pépin's Gratin Dauphinoise

Thursday, September 26, 2013

Spinach and Chickpeas with Lemony Rice Pilaf

What can I say, rice always seems to make its way into my 'fast and easy' meal choices during the week. Needless to say, we eat a lot of rice in our house, and my version of rice pilaf has a bit of delightful toasted orzo added to it, transforming it into what my husband likes to call 'rice a roni, but better.' 

This one is especially quick since a lot of the ingredients are easy to keep on hand for whenever the mood strikes you to whip something like this up. It's definitely filling enough for a meal for 3 and elegant (and easy) enough as a side with a larger meal for special guests. I put mushrooms in just about everything, but feel free to tweak it by adding or subbing in some of your favorite veg. 
 INGREDIENTS

for the lemony rice pilaf            


1 cup of your favorite long grain rice
1/2 cup orzo pasta
1 Tbsp extra virgin olive oil
1 Tbsp unsalted butter
1 small onion, finely chopped
peel and juice of medium lemon
2 tsp sea salt
3 cups low sodium chicken broth

for the spinach and chickpeas

1 lb bag of frozen organic chopped spinach
1 14 oz can chickpeas, drained, rinsed
   and smashed a bit with potato masher
1 medium onion, chopped
10 oz cremini or button mushrooms, sliced

3 cloves garlic, sliced
2 Tbsp extra virgin olive oil
salt and pepper to taste
                                                             
Place a medium pot that has a tight fitting lid over medium heat. Add the oil, butter and onion and saute till the onion begins turning translucent, about 5 minutes. 

Add the orzo and stir constantly till the orzo has become golden brown. Add the rice and stir for another 2 minutes, then add the broth, lemon juice and peel. Bring to a boil over high and stir once, then cover and reduce heat to low. Cook for 20 minutes, then remove from heat and let sit covered for 10 additional minutes. 

While the rice is cooking, place a large skillet over medium heat and add the oil and onion with a pinch of salt. Saute till softened, about 7 minutes. Add the mushrooms and cook till the liquid has released, then add the frozen spinach and another pinch of salt. Cover and cook for 5 minutes, then uncover and cook for another 5 - 7 minutes, stirring occasionally. Add the chickpeas and stir well, cooking long enough for them to be heated through. 

Remove the lemon peel from the rice and fluff with a fork. Serve the spinach and chickpeas over the rice and top with the feta or parm. This dish is great served family style, particularly if it will be as a side, or in individual bowls.


Monday, September 23, 2013

Twice Cooked Pork with Sofrito Rice

Recently my mom was asking me if I knew of some versatile new seasoning she could try to liven up her cooking a bit. I felt a bit stuck in a rut myself, and remembered that I've always wanted to try making sofrito but have been too lazy... so of course I told my mom she should make it, since she usually has more gumption than me in the kitchen. Luckily my mom has always been very generous, and froze me a cup of this amazing stuff. It can really go in just about anything, particularly any Latin American dish, and make it something really spectacular. Sofrito is so fragrant that its pungent aroma can be noticed through a zip lock bag, after the sofrito has been frozen. 

I had a bunch of leftover braised pork shoulder from a ramen experiment, and had no idea what to do with it. I remembered the sofrito my mom had left me in the freezer and knew I should incorporate that. I just started cooking, not having any clue where I was going to end up, but thankfully I wrote it all down because this meal ended up being really tasty. Not to mention fast, which is what I needed the day I made it since my daughter needed my undivided attention, hence the lack of photos in this post. 

INGREDIENTS

for the sofrito rice

1 cup of your favorite long grain rice
1/2 medium yellow onion, finely diced
1 Tbsp sunflower oil
1/2 cup sofrito 
1 3/4 cups low sodium chicken stock or water
2 tsp adobo seasoning

for the twice cooked pork

~2 lb cooked pork shoulder (about 4 cups)
   -I prepared mine by slowly braising it in a stock that had been made by simmering dried 
    shitake mushrooms and kotsuobushi, but any way you've cooked it (unless its been 
    slathered in barbecue sauce) where a mild flavor is yielded should work.
2 tsp smoked paprika
2 Tbsp vegetable oil
1 heaping Tbsp adobo seasoning
1 tsp cumin
6 - 8 garlic cloves, peeled and smashed
1 Tbsp tomato paste
1/2 cup unfiltered cider vinegar
2 cups low sodium chicken stock
a few splashes of your favorite hot sauce

1 can black beans, drained and rinsed

Place a medium pot over medium high heat and add the sunflower oil and onion. Saute for about 3 minutes, then add the sofrito. Cook till nearly all the moisture has evaporated, then add the rice. Saute for a few minutes till most of the rice has toasted a bit and turned opaque. Add the stock or water and adobo. Bring to a boil, giving it a couple good stirs while it comes up to temp. Cover and dial heat back to low and cook for 15 minutes. Remove from heat and let the rice sit for another 10 - 15 minutes, covered. Don't peek! 

While the rice is cooking, place a large enameled cast iron pan or non-stick skillet over medium heat. While the skillet is heating up, quickly pull apart the cooked pork if needed. Add the oil and pork to the pan, followed by the garlic. Saute for 5 minutes, then add the remaining ingredients and give it a good stir. Cook and stir occasionally till nearly every bit of moisture has evaporated and the pork starts sizzling again. Add a bit more vinegar or hot sauce to taste. 

Fluff the rice with a fork and serve in a large bowl, topping it with the pork and black beans. Serve with lots of hot sauce, or some nice crema and cilantro, or serve it along side some corn tortillas or roll it all up in a burrito. Either way, it's going to be really delicious.

*updated 9.24.13

Saturday, September 7, 2013

Tom Kha Kai

Tom Kha Kai is probably my favorite soup of all time. A few years ago a close friend's boyfriend and fellow culinary enthusiast 'El Capitan' showed me his way of preparing it. Since I always get a hot pot of this whenever I go out for Thai food, I was extremely stoked to learn how to make it at home. Although the ingredients were much more exotic than what I was accustomed to, it's a fairly simple soup to make. It takes some time, and a lot of tasting to get the perfect balance of flavors that suit one's own tastes. And it is very, very worth it. 

This soup can be made with a wide variety of add ins, and El Capitan favors lots of seafood in his version of Tom Kha. Since there are some shellfish allergies in my family, I only use chicken, which is what the 'kai' is for. Any asian grocery should have the ingredients you need for this, and they are all inexpensive. Most of them can be frozen as well, and are used in tons of other authentic Thai and Laos cuisine. I've included some photos of most of them so if you've never used them in your own cooking, you'll be able to find them with ease. 


galangal

and 

kaffir

lime

leaves


palm 

sugar

and

lemongrass


Galangal and kaffir lime leaves can be well wrapped in wax paper then placed in a freezer bag and be frozen for up to 3 months. The palm sugar keeps for a very long time in your pantry, and the lemongrass is the only thing that can't be kept for longer than a week in the fridge. Palm sugar comes in large discs, or jars of smaller, tablespoon size pucks. I went for the puck variety since it was easier to gauge the amount used. Galangal looks similar to ginger, and is a bit similar in taste as well, yet there is a very noticeable difference, so it is pretty essential to use rather than ginger. The kaffir lime leaves, lemongrass and galangal are used to flavor the broth, which is the base of the soup and gives it its characteristic background of flavors. 

Here are some of the beautiful oyster mushrooms I bought for the soup. Normally straw mushrooms are used, yet I didn't find any fresh ones at the store, so I preferred these. They have a mild mushroom flavor, which is another important factor. You don't want any ingredient's presence to outweigh another's in this recipe, so it's important to use a subtly flavored mushroom. Cremini or shitake are definitely out. 

My favorite Thai restaurant has broccoli and snow peas in their tom kha, so that's what went into mine as well. Traditionally bird's eye chilis are used to add the heat, but since we were sharing this with a 2 year old, I backed off of those and relied on sambal, sriracha and good chili oil to spice up our own bowls. A couple of chicken breasts, lots of coconut milk, cilantro and good chicken stock, and you're in business baby.

INGREDIENTS

2 quarts low sodium chicken broth, or homemade
5 14 ounce cans of your favorite full fat coconut milk
2 stalks lemongrass, pounded fiercely with the back of a knife & cut into thirds
8 - 12 kaffir lime leaves, depending on size
3 - 4 inch piece galangal, sliced
~3 palm sugar discs, crushed (this is where your tastes come into play - you may like this soup a tad sweeter than myself)
2 cups snow peas, halved
3 cups broccoli florets
12 - 16 ounces oyster mushrooms, stems removed and torn into bite sized pieces
2 - 3 boneless skinless chicken breasts
1/2 - 3/4 cup fish sauce (again, you may want more or less of this, so start small)
juice of 6 - 8 limes
1 bunch cilantro, leaves removed and set aside
lots of sambal, sriracha and chili oil to taste
cooked jasmine rice (optional)

In a very large pot (at least 6 quarts) over medium heat, add the chicken broth, coconut milk, lemongrass, kaffir lime leaves and galangal. Bring to a low simmer and dial back heat to low. Once at a simmer, let the ingredients steep for 30 minutes or so. Your kitchen should smell very fragrant, and the broth should taste quite strong. Remember, you will be adding quite a few other ingredients, and this infusion should not be diluted, but complimented. Remove the leaves, lemongrass and galangal with a slotted spoon and discard.

Keeping the heat on low, add the chicken breasts and poach till fully cooked, about 15 - 20 minutes depending on size. Remove and set aside to cool. Shred into large yet bite sized pieces.

Add the crushed palm sugar, lime juice and fish sauce. Then taste, taste, taste! I find that I like a lot of fish sauce in this. Although it is incredibly pungent, it helps develop the unique taste of this soup, and you may need more than you think. Ideally there should be an equal balance of sour, sweet, salty and spicy, with the major umami boost that the fish sauce provides. Some like a bit more lime than sugar, more spice than umami. Start with the minimal amounts and go from there. Ensure that the broth simmers for a few minutes with a few thorough stirs before tasting so that the additions are well incorporated.

Once you have a nice balance going in your soup, dial up the heat to medium and add the broccoli and mushrooms. If you'll be using straw mushrooms, use about 2 - 3 drained cans. Cook for 5 minutes before adding the snow peas and shredded chicken. Once the chicken is warmed through, its ready to serve.

Add a few sprigs or a handful of cilantro and sambal, srirach, and/or chili oil to taste. Serve over several spoonfuls of jasmine rice. Any leftover soup can be frozen for up to 1 month.

Recipe adapted from El Capitan (aka GT, Spacemage)


Tuesday, August 27, 2013

My Go-To Pasta


I've been making pasta like this for about as long as I can remember, so I never thought of it being something I could translate into a recipe. As we were inhaling it the other day though I thought to myself, why not? It probably seems insanely easy to me because I've made it over 100 times (probably just really easy for some), but maybe others will take it as something slightly different from their go-to weeknight meals. 

So, here it is, in all its simplistic and kinda cheating glory. My daughter has always loved this dish, and I usually make it right before the weekend hits so that she and my husband will have something more nutritious to eat while I'm at work besides blueberry scones from our local coffee place. It keeps really well in the fridge for up to 4 days, or you can definitely freeze it up to 2 months. Toss it into some airtight containers and into the freezer, and you have some homemade frozen dinners!

INGREDIENTS

1 lb Trader Joe's high fiber penne (or your favorite tubular pasta)

1 jar of your favorite spaghetti sauce plus 1 15 oz can diced tomatoes w/ no salt added OR
   1/2 jar of your favorite spaghetti sauce plus 1 28 ounce can diced tomatoes w/ no salt OR        
   1 28 ounce + 1 15 ounce can diced tomatoes... no salt added

3 Tbsp olive oil

3 cloves garlic, peeled

12 - 16 ounces button or cremini mushrooms, quartered or thickly sliced, your preference

2 small zucchini peeled (optional) and sliced into half moons

1/2 medium or 1 small onion, finely chopped

1 lb sun dried tomato and basil chicken sausage OR your favorite chicken sausage OR 
   leave it out

1/2 cup reserved pasta water

2 Tbsp unsalted butter

Parmesan cheese 

Place a large pot of water on the stove and crank the heat to get it boiling. Place your largest (I use a 16" round and 2.5" deep saute pan) pan over medium heat and get your olive oil in. Add the onion with a pinch of kosher or sea salt and stir occasionally for about 5 minutes.

While your onion is softening up, toss your garlic into a food processor and pulse till well chopped. Add the canned diced tomatoes and process till relatively smooth. If you don't have a food processor, a blender or immersion blender would work too, just don't let it go for too long. Let the tomato/garlic puree hang out while you prepare the rest of the sauce.

Add the mushrooms to the somewhat softened onion with a pinch of salt and saute till they release most of their moisture. Add the zucchini and cook for about 4 minutes. It'll look about like this:
Remove the sausage from its casing and break it into pieces as you add it to the pan. Cook for about 6 minutes, mashing the sausage with the back of a wooden spoon to break it up a bit. If you like your sauce extra chunky, leave it be. 

Add the tomato/garlic puree to the veg and sausage. Let it cook for a few minutes before adding the spaghetti sauce (if using). Reduce heat to low and stir occasionally while you get the pasta going.

By now your water should be at a ripping boil. Add about 1 Tbsp of kosher salt and drop in your pasta. Cook for half of the manufacturers recommended cooking time. Reserve at least 1/2 cup of the pasta water before you drain the par cooked pasta. 

Dump the pasta into the sauce (or, if you don't have a pan large enough to accommodate the sauce and pasta, carefully pour the sauce into the pot the pasta cooked in, followed by the drained noodles) and stir pretty much continuously for the remainder of the manufacturer's cooking time. At first it will look like this,
but as it cooks some of the sauce will absorb into the pasta, making it extra tasty, and it will look more like this:
Deeper in color, and much more flavorful than pasta cooked till al dente, then added to the sauce. I read an article by Christopher Kimball of Cook's Illustrated that featured this technique, and it really does works every time. Half the cooking time of whatever pasta you're using, cook it the remaining time in a lovely sauce. Many people say they love pasta even more on the second day... well, that's because it has absorbed a lot of the sauce. You get this result the first time with this dish, which I love.

Turn off the heat and add the butter, stirring well till it is completely melted and combined. You may think to yourself, 'butter in tomato sauce? I'm just going to skip it.' Just try it. It's not life altering, but it makes the dish memorably good, instead of just okay.

Serve with lots of grated Parmesan and share it with people you love. Or even just like a little, since you didn't really break a sweat making this dish. 


Sunday, August 25, 2013

Vegetable Fried Rice with Soy Poached Chicken

I've always loved fried rice, but never made it at home. We used to get Chinese take out frequently enough that I never had the desire or need to make it at home. Since we've cut down on eating out, I've been craving it something awful. I figured, how hard can it actually be to make? Not very! I know the instructions seem way too long for this to be an easy meal, but it's only very descriptive since the length of cooking time varies for the veg, and to keep it simple a little order is needed. 

The only 'trick' involved in making this dish is using 'day old' rice, which really means cold rice. You can definitely make the rice the day you want to prepare fried rice, you just have to ensure the rice is completely cold before doing so. Being an infamously impatient person when it comes to food, I surprisingly find it easier to make the rice the night before, and let it cool enough to put it in the fridge. Then I can make it whenever I want over the next few days - no pressure.

This dish comes together in a snap, and we've started referring to it as 'garbage rice', much in the same vain as garbage eggs. You can throw whatever is in your fridge that looks good in here. I'm only including in the recipe what I used for the batch pictured, but you can really get creative here. Or not. That's the beauty of fried rice. Add some protein and make it a complete meal, or keep it very simple for a side. 

INGREDIENTS

1 1/2 cup uncooked brown rice, or your favorite
   rice
2 3/4 - 3 cups water (if using brown rice, use all 3)
2  Tbsp canola or neutral oil
1 Tbsp sesame oil

1 lb button mushrooms (or any other favorite),
   thickly sliced
7 - 10 radishes, halved then cut into sixths
1 cup frozen peas (I prefer petit pois)
1/4 purple cabbage (or your fave variety), thinly
   sliced
1 bunch (usually 6 - 10) scallions, sliced thinly on 
   the bias, with a bit set to the side for garnish
2 cloves garlic, finely minced
4 large eggs, lightly beaten
~4 Tbsp post poaching liquid, Bragg's Amino Acids or fave soy sauce

for the chicken (optional)

2/3 cup Bragg's Amino Acids or low sodium soy
   sauce
1/2 cup low sodium chicken stock  
2 garlic cloves, peeled and smashed
1 inch knob of peeled ginger, smashed
1 Tbsp mirin
1 Tbsp sake (optional)                                      
1 - 2 boneless skinless chicken breasts

other ingredients you may have on hand or want to try...

bamboo shoots, baby corn, broccoli, cauliflower, green beans, eggplant, zucchini, tofu, pork or beef, edamame, sliced turnip, sweet potato, snow peas, kale or any other green, quinoa in place of rice... go crazy.

If using brown rice, bring 3 cups of water to boil in a medium sauce pan. Add the rice and bring back to a boil, then cover and reduce heat to low. Cook for 40 minutes, then remove from heat and let sit covered (don't peek, no matter how much you're tempted) for 15 more minutes. Remove lid and fluff with a fork. To cool down fast, spread rice out on a cookie sheet till room temp, then place it in the fridge to get cold. If using rice on a later date, you can still use the same method, just pack it up in an air tight container and toss in the fridge.
*If using a white rice, add a bit of oil to you pan and saute the rice till it becomes more opaque, then add the water. Bring to a boil and cover, reduce heat to low and cook for 15 minutes. The remaining preparation is the same as with brown rice.

I like to make the chicken first, so it can cool while I prepare the fried rice. Combine the Bragg's or soy, garlic, ginger, mirin and sake in a small pot. Cut the breast(s) into 2 equal pieces. Place into the poaching liquid and turn heat on to low and cover. Keep an eye on this, as you don't want it to do anything more than a gentle simmer. Cook for 20 minutes, then remove the chicken and set aside. Crank the heat up to medium high for 5 minutes to reduce the poaching liquid a bit. Set aside till cool enough to touch, then shred with your fingers into bite size pieces.

In a very large pan, add the canola oil and dial heat up to medium high. Add the mushrooms and cook till they've released all their liquid, about 4 minutes. Add the cabbage and cook for 5 more minutes. Add the radishes and cook for 5 minutes. Add the garlic and cook till it becomes fragrant, about 1 minute. Don't forget to stir occasionally between the additions. 

Dump in all your cold rice at once and stir very well. Add the frozen peas and shredded chicken and stir well. Push the rice up to the sides of the pan to make a little 'well' in the middle of the pan. Add the 1 Tbsp of sesame oil and the beaten eggs. Scramble your eggs, leaving big curds if that's what you prefer, or stir constantly to get a smaller curd. Stir the rice into the eggs, then add the scallions. Add ~4 Tbsp of the poaching liquid (more or less, depending on your tastes. Start with a little - you can always add more) and stir well. Taste for seasoning and serve with a sprinkle of sliced scallion and extra soy sauce or poaching liquid. Any extra poaching liquid can be stored in a squeeze bottle or airtight container and kept in the fridge for up to 1 week.