Showing posts with label easy. Show all posts

Saturday, January 11, 2014

Vanilla Malt Pancakes

Not too much rambling here - just going to cut to the chase. These were created from one of those "you know what would be so good right now?" moments, and they were a huge hit. Who doesn't love a big stack of flapjacks from their favorite diner along side a huge vanilla malt? Feel free to swap in maraschino cherries if you must, but raspberries are a favorite in this house and were dynamite with the cakes.
INGREDIENTS

1 1/4 cup AP flour
3 tsp baking powder
1/2 tsp kosher salt
1/3 - 1/2 cup malted milk powder (I go for the full whack here, since I love all things malted)
2 Tbsp unsalted butter, melted and slightly cooled
2 Tbsp sunflower, or other neutral oil
2 Tbsp best quality pure vanilla extract or vanilla bean paste
2 tsp sugar* (if using vanilla bean paste, do not add sugar)
2 eggs 
1 1/4 cup whole milk
1 cup well chilled heavy cream + 1 - 3 tsp powdered sugar (optional)
fresh fruit of your choice, or your favorite maraschino cherries

In place of maple syrup, which would drown out the flavors in these pancakes, I opt for softly whipped cream. About 30 minutes before you start your pancakes, place a bowl and whisk in the freezer. Prepare the whipped cream right before you start the cakes by combining the cream and sugar (no vanilla necessary since the cakes are laden with it) and whip with a hand held mixer (or by hand) to desired firmness (but don't take it too far - you don't want it to turn to butter... or maybe you do?). With every thing so well chilled, the cream will whip up super fast, even by hand.

Place a well seasoned cast iron skillet or non-stick skillet over medium heat. Have a tablespoon or 2 of unsalted butter nearby.

Place the flour, powder and salt in a small bowl and whisk to combine. Beat eggs in a large bowl till very frothy: about a minute or 2. Add the milk and malted milk powder to the eggs and continue to whisk till malt is incorporated. Add melted butter, oil, vanilla and sugar* and stir well. Pour the dry ingredients into the wet and fold them together with a rubber spatula til just combined; do not over mix. 
Add a little pat of butter to the pan before each batch of pancakes. I prefer a scant 1/4 cup measurement for each cake - you can do more or less for your preference. Cook til bubbly on top and dry around the edges - flip and cook for another 45 - 90 seconds, depending on size of cake. You can eat them as you go, or keep them warm in a 200 degree oven. I highly suggest the eat as you go- they are not as tender if kept warm.

This recipe is an adaptation of Lucian Truscott IV's Mississippi Pancakes from 
The New York Times

Tuesday, December 10, 2013

Best Homemade Popcorn, Milwaukee Style

So, I know what you may be thinking, or at least I was. A post on popcorn? Really? After much encouragement from a fellow popcorn aficionado, I succumbed to sharing my technique on homemade popcorn, which I've 'perfected' since moving to Milwaukee over 12 years ago. I have learned much about what makes the best bowl, and a lot of it was gleaned from various bars and movie theaters around town. There are a couple of common threads running through them all, one of which is the use of coconut oil - it is a must here. It doesn't have as high of a smoke point as it claims, yet it isn't necessary to get a ripping hot slick of oil in your pan to yield a great batch of popcorn. And plenty of popcorn salt is needed, and it should be added to the oil before you add a single kernel. This creates a perfectly seasoned batch, that sticks perfectly to each popped kernel.
The choice between white or yellow corn is entirely up to you. I prefer yellow, since I feel it has more flavor. Another option (though its not one in our home) is whether or not to add brewer's yeast. You'll find large shakers of the stuff at several theaters around town here, and if you find yourself wondering if you should shake some on your bag, do. You won't be disappointed. You may be a bit disheveled when you rise from your seat and see you're covered with a fine yellow powder (not dissimilar in appearance to pollen) all over your chest and lap. But its okay. At least around here, everyone knows why, and won't judge. Yes, brewer's yeast is very nutritious, packed with tons of B vitamins, but that isn't why you should try it. It gives a savory, slightly cheesy flavor to your popcorn that is not to be missed. It may not be for everyone, though the only person I know who has tried it and wasn't completely won over is my mother, and I think it's pretty much her only character flaw. I still adore her though. Happy Birthday, Mom!

INGREDIENTS


1/3 cup yellow popcorn kernels; I prefer
   Orville Redenbacher's


heaping 2 Tbsp coconut oil


1 tsp popcorn salt - yes, you should go
   out and get popcorn salt. Table salt
   isn't fine enough. You may need more to taste if 
   you're adding yeast.


1 - 2 Tbsp mini flake nutritional yeast
   (brewer's yeast), or to taste


Place a medium size pot with lid over medium heat. Add the coconut oil and let it melt almost completely before adding the salt. Pour in the popcorn and jiggle pan to get an even layer of kernels. Do not cover the pan. Shake the pan every 20 seconds or so til you get a couple of popped kernels. Once this occurs, cover the pan with the lid but keep your hand on top to keep the lid ajar so the steam can escape. This ensures super crisp popcorn. Shake the pan continuously as it pops to encourage unpopped kernels to fall to the bottom, and hopefully pop. Keep shaking the pan over the heat, and as soon as the popping seems not as aggressive, turn the heat off. Continue shaking the pan over the hot burner till all popping has subsided and remove from heat. 

Empty the popcorn into a large bowl and sprinkle over 1/4 of the yeast you plan on using and give it a gentle toss with your hands. What ever you do, don't toss the whole bowl of popcorn by flipping it around in the bowl, like you would flip a pancake in a pan without a spatula. This will only shake all the yeast to the bottom, and it won't be on your popcorn. I like to use a spritz of canola oil spray between each addition of yeast to make it stick a little better. Continue til all the yeast is used, tasting between each addition. Stop early if you like it on the lighter side, or keep going if you like it well coated with yeast, like myself. Serve immediately. Don't put the pot in the sink right away, because if you have more than 2 people enjoying it, you're probably going to have to make another batch.

Friday, November 22, 2013

Hot and Sour Soup

Hot and Sour Soup has been one of my almost favorite things for years. I love love love tangy dishes, especially when that tang comes from copious amounts of vinegar or citrus. Plus, this soup has a lot of the flavors I love in Chinese cooking - lots of porky goodness, warm nutty toasted sesame oil, a good kick of heat, and the firm tofu that aids in rounding out some of these intense flavors. What was keeping me from truly embracing it was the texture. You know what I'm talking about here - that thick, gloopy broth that isn't so different from what runs out of my nose during allergy season? Yeah, not appetizing. 

Surprisingly, lots of recipes online call for the addition of a corn starch slurry to be added to the soup to achieve that undesirable viscosity, so apparently there are those of you out there that enjoy it. Me, not so much. When I stumbled across this gem, I knew it was a keeper. It has been on repeat in our house for quite a while now, mainly because it comes together super fast and nearly all the ingredients are things you probably already have in your fridge and pantry. 

I usually try not to get too nostalgic about my food memories, but I feel an urge to for this post. When I tasted this version of hot and sour soup, I immediately remembered the first time I had egg drop soup that wasn't prepared in a Chinese restaurant's kitchen. A high school girlfriend invited me over for dinner one night at her parent's house, and I gladly accepted, without knowing of the amazing treats that lay ahead of me. Her mom's egg drop soup was divine; homemade chicken stock, perfectly cooked ribbons of egg, a subtle hint of lemon, and none of that slippery, goopy texture. I never knew it could be that good. This recipe reminds me a lot of that - simple, yet packed with flavor and super comforting, something a friend's mom or grandma would make. I was 16 at the time, and I still remember that entire meal. Along side the soup, we had bean sprouts quickly sauteed with soy and butter, perfectly cooked rice, and fried spring rolls. Heaven. 

I didn't make any alterations to this recipe, since I think it's pretty much perfect already, but there is of course room to make it more sour or spicy to suit your tastes. I've been reading cookbooks a little obsessively lately, and this little gem was from Flour, Too by Joanne Chang. Seriously, check it out - it is full of amazing goodies, and lots of sweets, which I need to start making more sparingly... it's been like Christmas here with all the cookies, brownies, cakes, etc that I've had around. I can't remember the last time I didn't eat at least 2 cookies in a day. But enough of my new baking/eating my baking addiction. 

INGREDIENTS


2 Tbsp vegetable oil
1 garlic clove, minced
1 Tbsp fresh ginger, peeled and minced
4 scallions, sliced thin, plus
   more for garnish
1/2 lb ground pork*
4 cups low sodium chicken broth
1 lb firm tofu, cut into 1/2 inch cubes
4 - 5 button mushrooms, cleaned and
   thinly sliced
1 tsp sugar
2/3 cup rice vinegar, plus
   more to taste
3 Tbsp soy sauce
1 tsp freshly ground black pepper
1 Tbsp toasted sesame oil
1 Tbsp sriracha, plus more to taste
2 large eggs, lightly beaten

Prep all your ingredients before you even set your pot over the heat, since this soup comes together super fast. You can use pre-ground pork from the supermarket, or *grind your own, which is what I prefer. Simply take a pork tenderloin or some boneless chops and cut them into smaller hunks that your food processor can handle, and place them on a plate. Put the pork in the freezer for 20 minutes to firm up a touch so when you process it, it doesn't get all gummy on you. Once the pork is slightly firmed up from the freezer, toss it in 1/2 pound increments into your food processor and give 5 - 7 1 second pulses. Set aside the 1/2 pound needed for the soup and refrigerate or freeze what remains. You'll now have delicious ground pork with no mystery cuts and much less fat than what you'd get at the grocer. 

Place a large saucepan over medium high heat and add the vegetable oil. Add the ground pork, ginger, garlic and scallions, stirring occasionally for ~1 minute. Break up the pork a bit with your spoon, but don't fret about getting into fine pieces - some variation in its texture is very welcome in this soup. When it gets to about this point, you'll want to add the stock:
Dial up the heat and cover to bring the soup to a simmer, which should take a couple of minutes. Add the the remaining ingredients except the eggs, and cook uncovered till it comes to a simmer. Once there, start swirling the soup with a fork while you slowly pour in the beaten eggs. Serve immediately with a touch more sesame oil, scallion greens for garnish, and rice vinegar and sriracha at the ready if you want a bit more bite to your soup.

Recipe for 'Mama Chang's Hot and Sour Soup' from Joanne Chang's Flour, Too

Friday, November 8, 2013

Orzo and Lentil Salad with Dill

The first time I had this salad was years ago at a friend's annual labor day party, and everyone loved it so much that it now makes an appearance every year. It's a very simple salad with not many ingredients, so it's kind of vital to use the best you can afford/get your hands on. The flavors mingle together really well, yet still manage to be prominent enough to taste every nuance. So, get the best olives, preferably with the pits (it is cumbersome to pit them yourself, but it'll be worth it since the texture between pitted and not is night and day), the best french goat's milk feta, and some really special extra virgin olive oil. The salad isn't swimming in oil, yet there is enough to keep the ingredients flowing and not clumped up.

A small disclaimer, I am aware that this recipe comes from a James Beard cookbook full of different kinds of salads... or is it pasta dishes... not really sure, it's been a while since I've perused it. I've never referenced the recipe myself when making this dish, since I simply go with the ratios of ingredients that suits my taste. I may be forgetting some, or including things that were never in the original salad I tasted. It's really no matter, because as long as you use high quality ingredients here, whatever ratio of them you prefer, it will be pretty delicious to you too.

INGREDIENTS

1 1/2 cup uncooked orzo pasta
heaping 1/2 cup dried lentils
~1 cup kalmatta or favorite olive,
   pitted and finely chopped
4 - 6 ounces feta, crumbled
1/3 cup good quality extra virgin
   olive oil
~1/2 cup dill, lightly packed and 
   coarsely chopped
1 small lemon, juiced
several splashes red wine 
   vinegar (optional)
sea or kosher salt
freshly ground pepper


Set a large pot of salted water on the stove to boil for the pasta. Meanwhile, spread out the lentils in an even layer and check them over for any non-lentil debris. Place the lentils in a medium sauce pan with 2 cups cold water. Cover and turn heat up to medium high, and give them a good stir after a few minutes. Once they come to a boil, dial heat down to medium low and cook for 20 minutes (still covered), or until they are tender yet not mushy, stirring occasionally. Drain any remaining water from the lentils, and set aside. 

Once the water is at a boil, dump in the orzo and cook till al dente. Drain the pasta and immediately rinse in cold water and drain thoroughly. While the pasta is cooking, prep all other ingredients and place in a large bowl, preferably one you don't mind serving in. Add the cooked orzo and lentils with a couple pinches of salt and lots of turns of pepper. Toss well and adjust seasoning if needed. This is where I like to add some red wine vinegar, or more lemon juice if that is more your thing. Either way, the orzo and lentils really soak up the seasonings. The earthiness of the lentils can really hold up to some aggressive seasonings, but don't be tempted to add too much acid or salt, since too much of either can thoroughly offset the balance of flavors you want to achieve. 


This salad can be served room temperature, but I think it tastes the best after sitting in the fridge over night so the flavors can really meld. Serve with a few more sprigs of dill and a good drizzle of olive oil. This is great as a side, but I love a big bowl of it for a totally filling lunch.

Tuesday, October 29, 2013

Coconut Macaroons with Dark Chocolate

I'm going to be honest here - most recipes I try for the first time end up going on here, since they usually turn out well the first time I try them, or they are a tried and true dish that I've been riffing on for years and decided to finally write it down. These macaroons are the first thing I've made at least a dozen times before I've found what I think is as close to a perfect coconut macaroon you're going to get. It took pounds of shredded coconut and sugar before I got these right. 

Although I knew what I wanted in these, I didn't know how to get there. Kind of like starting off with what you don't like about something, and going from there. I don't like the texture of shredded coconut in a macaroon - I wanted a creamier, smoother take on it, similar to the first one I ever had nearly 20 (gasp) years ago. They were large and wonderfully round, with a crisp golden brown exterior with a creamy just-right-amount of sweetness interior, with a pleasant chew. 

Lots of research in various cookbooks and online led me down pretty much the same path. There aren't too many variations out there, which was a bit disappointing. Then I found what I was missing... sweetened condensed milk! I felt like a complete dumb dumb when I stumbled across Ina Garten's version and realized that was what was missing! The glue that holds 7 layer bars together (one of my fav desserts, with coconut no less!) was the magic ingredient I was missing. 
This recipe is an adaptation of Ina's. I processed the coconut for quite a bit in the food processor to achieve the smaller crumb that I was after, but feel free to skip this step if you prefer the straight up shredded coconut texture.

INGREDIENTS

14 ounces sweetened shredded coconut,

   pulsed in a food processor for about 1 minute
14 ounce can sweetened condensed milk 
   (not to be confused with evaporated milk)
1/4 cup almond flour
1/2 tsp good vanilla extract plus
   1/2 tsp almond extract, or 1 full 
   tsp of either
3 large egg whites
pinch of kosher salt 
pinch of cream of tarter
6 ounces good quality dark chocolate,
   melted and slightly cooled (optional... sorta)

Preheat oven to 325*, ensuring there are racks placed on the upper and lower middles of the oven. Fully combine the processed coconut, sweetened condensed milk, almond flour, and extracts in a large bowl. In a smaller  bowl, use an electric hand mixer to whisk the whites, salt, and cream of tarter to firm peaks. Gently fold the beaten egg whites into the coconut mixture. Set aside. 

Line 2 cookie sheets with parchment paper. Do not be tempted to break out your silpat here - they will surprisingly stick like crazy to this. Scoop out scant tablespoons of batter and drop them onto the sheets, leaving a roomy inch or so between each cookie. Pop both sheets in the oven onto each rack and bake for 35 minutes or till golden brown, swapping their places in the oven about halfway through.

Remove from oven and let cool for a minute before placing on a wire rack to cool completely. Meanwhile, chop up the chocolate using a serrated knife and empty into an oven safe glass bowl. You can either use a double boiler type method (which I prefer, since you're more in control and less likely to scorch the chocolate) or the microwave. For the stove top, place a medium sauce pan filled with an inch of water and bring to a gentle simmer. Place the bowl on top and melt the chocolate, stirring often, till nearly all of it is melted. Remove from heat and stir continuously till all the chocolate has melted. If using the microwave, heat the chocolate in 30 second intervals, stirring well between each one, till most of the chocolate has melted. 

Flip the parchment paper over on one of the cookie sheets, which should now be fully cooled. Dunk, dip, drizzle or drown each macaroon in the melted chocolate, and place them on the parchment. Pop into the fridge and chill till the chocolate has completely set, about 30 minutes. Remove and place into an airtight container. These cookies will keep for 2 days on the counter top, or a week in the fridge.

Tuesday, October 22, 2013

Sunday Dinner Volume II

Now that the colder weather is steadily becoming more frequent, I start whipping out Sunday dinner type meals more often. When it's in the 30s outside with the sun 'taking a nap' as my daughter likes to put it, there is nothing more comforting than having a pork roast slowly roasting in the oven, with a couple of pots on the stove top simmering away. 

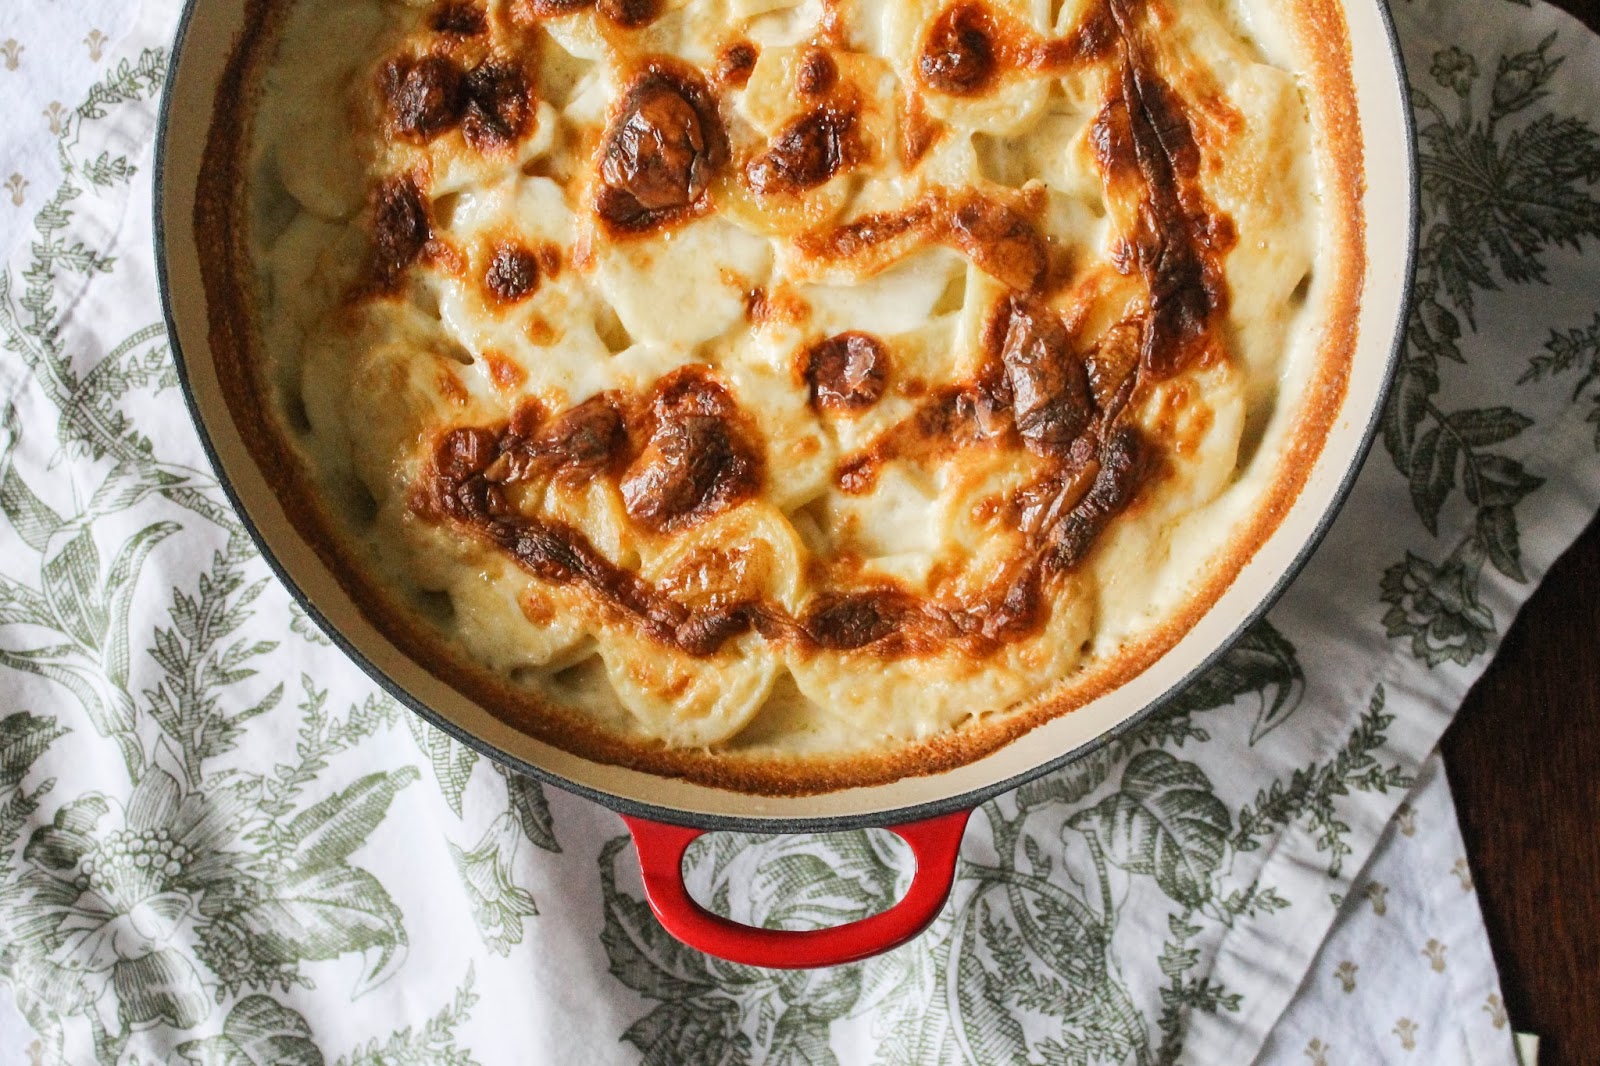
The main reason I had to come up with a good old fashioned family dinner was because I had a yen for dauphinoise potatoes. Not a dish that cozies up quite the same to a ham sandwich (well, maybe when eaten cold the following day- very good, by the way) or a bowl of chili. I love chicken with this, but wanted to use a pork roast so I could have plenty of left overs to go with some super yummy ramen broth I'd been saving in the freezer. Which is why I kept the seasoning of the roast itself pretty simple, and chose the 'wow' factor to come from the groan inducing sherry cream sauce. This sauce is so good, if I could get away with it I'd make extra and serve it in little demitasse cups along the side. Good gravies and sauces are so well loved on my side of the family, that we don't think it is wrong in any way to straight up imbibe them. 

All of these recipes are very simple and can be made with complete ease as long as you have enough time. That is the beauty of a good Sunday dinner - a tiny bit of prep, and then relax on the couch while you enjoy all the luxuriant smells coming out of the kitchen. And, the leftovers. So good, and so many things you can do with them. For example, eating the dauphinoise potatoes cold, straight from the fridge. 
There are lots of dauphinoise potato recipes out there, but my favorite is Jacque Pépin's simple tried and true version. No cheese here folks, and you will not miss it. Not even a little. The aromas that flood your home as these bake in the oven are divine, and my daughter who is a devout potato hater, (even french fries sometimes) gobbled these up without a trace of encouragement. 

INGREDIENTS

for the brined pork roast and sherry cream sauce

1 2 - 3 lb boneless pork loin roast, any silver skin removed
2 quarts cold water
4 garlic cloves, peeled and smashed
12 - 15 pepper corns
1 bay leaf
1/4 cup sugar
1/4 cup table salt or ~1/2 cup kosher, depending on brand
1 Tbsp canola oil

1/3 cup dry sherry
1 shallot, minced
1 garlic clove, thinly sliced
1/2 cup heavy cream + 1/4 cup whole milk, or 3/4 cup half and half
1 - 2 tsp apple cider vinegar
salt and pepper to taste

Place all ingredients except the pork roast in a large pot with a lid. Mix well with a wooden spoon till all the sugar and salt is dissolved. Add the roast, cover, and place in the fridge for 1 to 2 hours, depending on the size of your roast. 

Preheat oven to 375*. Remove roast from the brine and thoroughly dry it off with paper towel. Add the canola oil to an oven safe pan and place over medium high heat. Sear all sides of the roast to golden brown. Place in the oven and roast till internal temp reaches 135*, about 45 minutes to 1 hour 15 minutes, depending on size of roast.

Remove from oven and let rest on a cutting board for at least 15 minutes before slicing. 

Meanwhile, place the pan that the pork cooked in back over medium low heat. Add a touch of canola oil and the shallot. Saute for a couple minutes, then add the garlic and cook for another minute or so. De-glaze the pan with the sherry, scraping up all the brown bits and let reduce by nearly half. Add the cream and milk and bring to a simmer, then reduce heat to low and let simmer for 3 - 5 minutes to let it thicken, stirring often. Stir in the apple cider vinegar, then taste for seasoning. Add any pork juices that have accumulated on the cutting board and stir them in. Since the roast is brined, the pan juices will be quite salty, so it's best to wait till the end to season the sauce if needed. 

Slice into half inch thick pieces and adorn with copious amounts of sherry cream sauce.

for the dauphinoise potatoes

1 3/4 lb potatoes, peeled (I used red bliss, but 
   Jacques recommends yukon gold)
2 1/2 cups whole milk
3 garlic cloves, minced
scant tsp kosher salt
1/2 tsp ground black pepper
1/8 tsp freshly ground nutmeg
1 cup heavy cream
1 Tbsp unsalted butter, softened

Preheat oven to 375*. Combine the milk, garlic, salt, nutmeg and pepper in a large sauce pan. Slice the potatoes 1/8 inch thick and add them to the pan as you go to ensure they don't get discolored.

Butter a large (at least 6 quart) baking dish with the softened Tbsp of butter.

Turn the heat on to medium high and bring the mixture to a gentle boil, stirring often to prevent the slices of potato from sticking to one another.

Once it reaches a boil, add the ingredients to the buttered dish and spread them out evenly. Add the heavy cream. Bake on a baking sheet (just to be on the safe side) for up to one hour, or until most of the liquid is absorbed and the potatoes are easily pierced with a knife. Let the dish stand, covered, for 20 - 30 minutes before serving to allow it to completely set. 
I was in the mood for petit pois with pearl onions swimming in butter for this meal, but endive with mushrooms and peas would probably go even better. 

Dauphinoise Potatoes slightly adapted from Jacques Pépin's Gratin Dauphinoise

Monday, October 14, 2013

Vanilla Almond French Toast with Salted Caramel Sauce

Pancakes have been a long running favorite in our house, so much so that the little one didn't even know what french toast was... yet. She has had a serious yen for toast ever since her first bite, so it didn't take much convincing to get her to try this. Especially with it being made with her bread of choice: brioche. 

The salted caramel sauce puts this 'dessert for breakfast' over the top, with its thick and rich gooey-ness running down the edges of the crisp-almondy-exterior, warm-vanilla-custardy-interior goodness. 
I'd been looking for a use of almond flour that didn't dominate a recipe, since it is so caloric and high in fat. Granted, there are some great health benefits there, but not enough to excuse my guilt for using 2+ cups in a cookie recipe. And yes, brioche french toast isn't exactly nutritious or kind on the hips, but hey, I had to start somewhere.  Almond flour is however, a perfect coating for french toast, and who doesn't love the combination of vanilla and almond?


This is not something you enjoy everyday, which makes it a perfect choice for a weekend breakfast/brunch for a crowd of special people. The salted caramel sauce can be made up to several days ahead, leaving you to focus on the main preparation. It does help to plan ahead and get some brioche a few days before you make this dish, enhancing the bread's ability to soak up all that delicious eggy vanilla custard and prevent the inside from being too squidgy. You want a custardy interior, not wet and mushy. 


INGREDIENTS

8 1 inch thick slices 3 day old 
   brioche
7 large eggs
3/4 cup half and half or whole 
   milk
2 tsp vanilla or vanilla bean paste
pinch of kosher salt
1 heaping cup almond flour, plus 
   ~1/2 cup more if needed
4 Tbsp unsalted butter, divided


for the salted caramel sauce

5 Tbsp unsalted butter
1/4 cup light brown sugar
1/4 cup superfine sugar aka 
   bakers sugar
3 Tbsp golden syrup, or light corn 
   syrup if in a pinch
1/2 cup heavy cream
1 tsp very good vanilla
1 tsp fleur de sel, or maldon salt,
   or Portuguese 'Salt Cream' sea salt

In a small sauce pan, add all the caramel sauce ingredients except for the salt, cream and vanilla, then place over medium heat. Give a little smoosh to the sugars with a wooden spoon to help combine them, then don't touch! 

Let the mixture come to a vigorous simmer and set a timer for 3 minutes. Feel free to swirl the caramel a few times as it bubbles away. Add the cream and salt and let simmer for 1 more minute - no more, no less. Remove from heat and add the vanilla, stirring into the caramel with wooden spoon. 

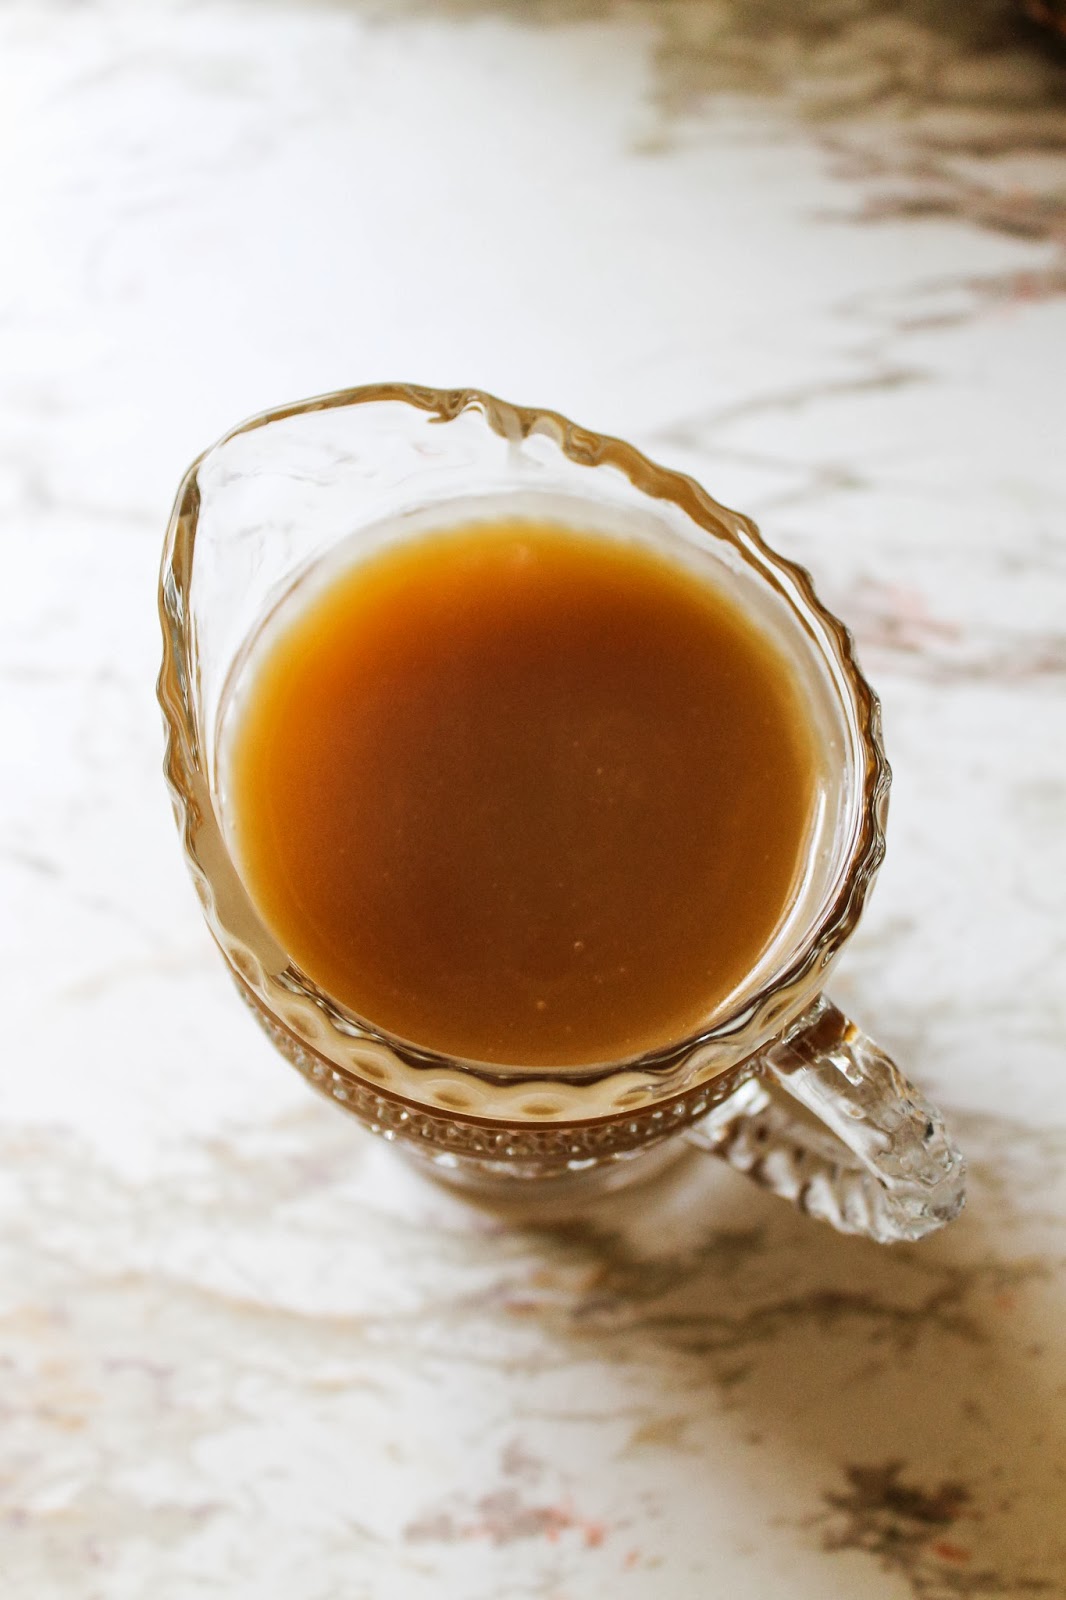
The sauce will have a pretty thin consistency at this point, which is fine - don't panic! Let the sauce cool for 10 minutes and empty into a glass vessel that has a spout for easy pourability. Let the sauce cool for about 30 minutes till it becomes nice and thick, but still warm enough to top your french toast. You can also make this several days in advance, just heat it up in the microwave for 30 second intervals, stirring well at the end of each zap, till it comes up to desired temp.

Place the eggs, milk or half and half, vanilla and salt into a glass pie plate or other deep, flat bottomed dish. Whisk till very well combined. In another similar dish, add the almond flour and shake the dish a tad to evenly distribute the flour over the bottom.

Place a large non-stick skillet over medium low heat. Working with 2 pieces at a time, place one slice of brioche in the custard mixture and let sit for 1 minute on each side. Add 1 Tbsp of butter to the pan. Dredge the first slice into the almond flour on each side while the second is soaking in the custard. Repeat with the second slice. Shake a bit to remove excess and add both to the pan. Cover and cook for 4 minutes, then remove lid. Let cook for another minute or so, or till the first side is golden brown. Flip and cook for another 3 minutes or so. Continue with the remaining brioche. You may need to add a bit more almond flour to the dish to ensure they all get a nice coating, maybe another 1/2 cup or so.

The french toast remains pretty piping hot even after sitting for a good 5 minutes or so, but feel free to keep them warm in a 200* oven while you make up the entire batch.

1 piece is a good serving to start with, especially if you have some fresh fruit to go along with it. 2 per person is what we go with if we're feeling very indulgent. 

Salted Caramel Sauce recipe from Nigella Lawson

Wednesday, October 9, 2013

Ginger Molasses Cookies

We've been watching a lot of Fantastic Mr. Fox lately, and thought it'd be fun to make a special treat that my little one could doubly enjoy since it's referenced in the movie. Mrs. Bean's nutmeg ginger apple snaps seemed like they would be a hit. Alas, I was short on some of the required ingredients and ended up making a simpler version that still turned out quite 'fantastic'. 

They are irresistibly thin, yet still stay soft and very chewy, thanks to to the only sugars being molasses and brown sugar. Even with the heavy amount of ground and fresh ginger, they didn't taste overly gingery and combined perfectly with the rest of the autumnal flavors. The recipe makes a big batch of cookies, and while I was placing a stack of them in the freezer, I knew I'd definitely have to try making these into some dynamite ice cream sandwiches. For next time. 

This version I adapted from Mario Batali's recipe, which I will eventually attempt so we can try the real deal. In case you haven't seen the movie and are wondering how Mr. Batali came about creating this recipe (or even if you have, you may have missed it), Batali has a 'cameo' so to speak as Rabbit, who happened to be a dazzlingly fast chef in the film. 
INGREDIENTS

1 1/2 cups unsalted butter (3 sticks), softened to room temp
2 cups light brown sugar
1/2 cup molasses, preferably not an extra dark variety
2 large eggs
3 1/2 cups unbleached AP flour
2 tsp ground ginger
1 tsp freshly grated nutmeg
2 tsp cinnamon
4 tsp baking soda
1 tsp kosher salt
pinch of ground allspice
3 Tbsp fresh ginger, grated
Preheat oven to 350*. In a standing mixer, cream butter and sugar until light and fluffy, about 6 - 7 minutes, scraping down the bowl once or twice.

In a separate bowl, combine flour, ground ginger, nutmeg, soda, cinnamon, salt and allspice. Whisk together to combine.

Add molasses and eggs to the creamed butter and sugar. Mix on medium low until well combined. Add grated ginger. Adjust speed to low and slowly add the dry ingredients and mix until well combined, about 2 minutes.
If you want to appease any little ones hovering nearby, use pasteurized eggs so they can enjoy some of the delicious dough. Or live on the wild side and let them have just, um, a little.
Line a couple of baking sheets with parchment paper or a silpat. Drop the dough in 1 Tbsp increments, about 6 per sheet to avoid them from running into one another. They spread a lot. You can bake on each sheet of parchment twice before they're spent, then use a fresh sheet. Bake one sheet at a time for 10 minutes, remove from the oven and let sit on the sheet for 1 minute to allow the cookies to set before transferring to a wire rack to cool.
If you don't feel like baking these all at once, simply cover the mixing bowl with plastic wrap and throw in the fridge (it'll keep for 2 days), just add 2 minutes onto the baking time if you're going to bake them straight from the fridge. The dough also freezes well for up to 6 weeks, the baked cookies up to 1 month.

Monday, September 23, 2013

Twice Cooked Pork with Sofrito Rice

Recently my mom was asking me if I knew of some versatile new seasoning she could try to liven up her cooking a bit. I felt a bit stuck in a rut myself, and remembered that I've always wanted to try making sofrito but have been too lazy... so of course I told my mom she should make it, since she usually has more gumption than me in the kitchen. Luckily my mom has always been very generous, and froze me a cup of this amazing stuff. It can really go in just about anything, particularly any Latin American dish, and make it something really spectacular. Sofrito is so fragrant that its pungent aroma can be noticed through a zip lock bag, after the sofrito has been frozen. 

I had a bunch of leftover braised pork shoulder from a ramen experiment, and had no idea what to do with it. I remembered the sofrito my mom had left me in the freezer and knew I should incorporate that. I just started cooking, not having any clue where I was going to end up, but thankfully I wrote it all down because this meal ended up being really tasty. Not to mention fast, which is what I needed the day I made it since my daughter needed my undivided attention, hence the lack of photos in this post. 

INGREDIENTS

for the sofrito rice

1 cup of your favorite long grain rice
1/2 medium yellow onion, finely diced
1 Tbsp sunflower oil
1/2 cup sofrito 
1 3/4 cups low sodium chicken stock or water
2 tsp adobo seasoning

for the twice cooked pork

~2 lb cooked pork shoulder (about 4 cups)
   -I prepared mine by slowly braising it in a stock that had been made by simmering dried 
    shitake mushrooms and kotsuobushi, but any way you've cooked it (unless its been 
    slathered in barbecue sauce) where a mild flavor is yielded should work.
2 tsp smoked paprika
2 Tbsp vegetable oil
1 heaping Tbsp adobo seasoning
1 tsp cumin
6 - 8 garlic cloves, peeled and smashed
1 Tbsp tomato paste
1/2 cup unfiltered cider vinegar
2 cups low sodium chicken stock
a few splashes of your favorite hot sauce

1 can black beans, drained and rinsed

Place a medium pot over medium high heat and add the sunflower oil and onion. Saute for about 3 minutes, then add the sofrito. Cook till nearly all the moisture has evaporated, then add the rice. Saute for a few minutes till most of the rice has toasted a bit and turned opaque. Add the stock or water and adobo. Bring to a boil, giving it a couple good stirs while it comes up to temp. Cover and dial heat back to low and cook for 15 minutes. Remove from heat and let the rice sit for another 10 - 15 minutes, covered. Don't peek! 

While the rice is cooking, place a large enameled cast iron pan or non-stick skillet over medium heat. While the skillet is heating up, quickly pull apart the cooked pork if needed. Add the oil and pork to the pan, followed by the garlic. Saute for 5 minutes, then add the remaining ingredients and give it a good stir. Cook and stir occasionally till nearly every bit of moisture has evaporated and the pork starts sizzling again. Add a bit more vinegar or hot sauce to taste. 

Fluff the rice with a fork and serve in a large bowl, topping it with the pork and black beans. Serve with lots of hot sauce, or some nice crema and cilantro, or serve it along side some corn tortillas or roll it all up in a burrito. Either way, it's going to be really delicious.

*updated 9.24.13