Showing posts with label kid friendly. Show all posts

Saturday, January 11, 2014

Vanilla Malt Pancakes

Not too much rambling here - just going to cut to the chase. These were created from one of those "you know what would be so good right now?" moments, and they were a huge hit. Who doesn't love a big stack of flapjacks from their favorite diner along side a huge vanilla malt? Feel free to swap in maraschino cherries if you must, but raspberries are a favorite in this house and were dynamite with the cakes.
INGREDIENTS

1 1/4 cup AP flour
3 tsp baking powder
1/2 tsp kosher salt
1/3 - 1/2 cup malted milk powder (I go for the full whack here, since I love all things malted)
2 Tbsp unsalted butter, melted and slightly cooled
2 Tbsp sunflower, or other neutral oil
2 Tbsp best quality pure vanilla extract or vanilla bean paste
2 tsp sugar* (if using vanilla bean paste, do not add sugar)
2 eggs 
1 1/4 cup whole milk
1 cup well chilled heavy cream + 1 - 3 tsp powdered sugar (optional)
fresh fruit of your choice, or your favorite maraschino cherries

In place of maple syrup, which would drown out the flavors in these pancakes, I opt for softly whipped cream. About 30 minutes before you start your pancakes, place a bowl and whisk in the freezer. Prepare the whipped cream right before you start the cakes by combining the cream and sugar (no vanilla necessary since the cakes are laden with it) and whip with a hand held mixer (or by hand) to desired firmness (but don't take it too far - you don't want it to turn to butter... or maybe you do?). With every thing so well chilled, the cream will whip up super fast, even by hand.

Place a well seasoned cast iron skillet or non-stick skillet over medium heat. Have a tablespoon or 2 of unsalted butter nearby.

Place the flour, powder and salt in a small bowl and whisk to combine. Beat eggs in a large bowl till very frothy: about a minute or 2. Add the milk and malted milk powder to the eggs and continue to whisk till malt is incorporated. Add melted butter, oil, vanilla and sugar* and stir well. Pour the dry ingredients into the wet and fold them together with a rubber spatula til just combined; do not over mix. 
Add a little pat of butter to the pan before each batch of pancakes. I prefer a scant 1/4 cup measurement for each cake - you can do more or less for your preference. Cook til bubbly on top and dry around the edges - flip and cook for another 45 - 90 seconds, depending on size of cake. You can eat them as you go, or keep them warm in a 200 degree oven. I highly suggest the eat as you go- they are not as tender if kept warm.

This recipe is an adaptation of Lucian Truscott IV's Mississippi Pancakes from 
The New York Times

Tuesday, December 10, 2013

Best Homemade Popcorn, Milwaukee Style

So, I know what you may be thinking, or at least I was. A post on popcorn? Really? After much encouragement from a fellow popcorn aficionado, I succumbed to sharing my technique on homemade popcorn, which I've 'perfected' since moving to Milwaukee over 12 years ago. I have learned much about what makes the best bowl, and a lot of it was gleaned from various bars and movie theaters around town. There are a couple of common threads running through them all, one of which is the use of coconut oil - it is a must here. It doesn't have as high of a smoke point as it claims, yet it isn't necessary to get a ripping hot slick of oil in your pan to yield a great batch of popcorn. And plenty of popcorn salt is needed, and it should be added to the oil before you add a single kernel. This creates a perfectly seasoned batch, that sticks perfectly to each popped kernel.
The choice between white or yellow corn is entirely up to you. I prefer yellow, since I feel it has more flavor. Another option (though its not one in our home) is whether or not to add brewer's yeast. You'll find large shakers of the stuff at several theaters around town here, and if you find yourself wondering if you should shake some on your bag, do. You won't be disappointed. You may be a bit disheveled when you rise from your seat and see you're covered with a fine yellow powder (not dissimilar in appearance to pollen) all over your chest and lap. But its okay. At least around here, everyone knows why, and won't judge. Yes, brewer's yeast is very nutritious, packed with tons of B vitamins, but that isn't why you should try it. It gives a savory, slightly cheesy flavor to your popcorn that is not to be missed. It may not be for everyone, though the only person I know who has tried it and wasn't completely won over is my mother, and I think it's pretty much her only character flaw. I still adore her though. Happy Birthday, Mom!

INGREDIENTS


1/3 cup yellow popcorn kernels; I prefer
   Orville Redenbacher's


heaping 2 Tbsp coconut oil


1 tsp popcorn salt - yes, you should go
   out and get popcorn salt. Table salt
   isn't fine enough. You may need more to taste if 
   you're adding yeast.


1 - 2 Tbsp mini flake nutritional yeast
   (brewer's yeast), or to taste


Place a medium size pot with lid over medium heat. Add the coconut oil and let it melt almost completely before adding the salt. Pour in the popcorn and jiggle pan to get an even layer of kernels. Do not cover the pan. Shake the pan every 20 seconds or so til you get a couple of popped kernels. Once this occurs, cover the pan with the lid but keep your hand on top to keep the lid ajar so the steam can escape. This ensures super crisp popcorn. Shake the pan continuously as it pops to encourage unpopped kernels to fall to the bottom, and hopefully pop. Keep shaking the pan over the heat, and as soon as the popping seems not as aggressive, turn the heat off. Continue shaking the pan over the hot burner till all popping has subsided and remove from heat. 

Empty the popcorn into a large bowl and sprinkle over 1/4 of the yeast you plan on using and give it a gentle toss with your hands. What ever you do, don't toss the whole bowl of popcorn by flipping it around in the bowl, like you would flip a pancake in a pan without a spatula. This will only shake all the yeast to the bottom, and it won't be on your popcorn. I like to use a spritz of canola oil spray between each addition of yeast to make it stick a little better. Continue til all the yeast is used, tasting between each addition. Stop early if you like it on the lighter side, or keep going if you like it well coated with yeast, like myself. Serve immediately. Don't put the pot in the sink right away, because if you have more than 2 people enjoying it, you're probably going to have to make another batch.

Tuesday, October 22, 2013

Sunday Dinner Volume II

Now that the colder weather is steadily becoming more frequent, I start whipping out Sunday dinner type meals more often. When it's in the 30s outside with the sun 'taking a nap' as my daughter likes to put it, there is nothing more comforting than having a pork roast slowly roasting in the oven, with a couple of pots on the stove top simmering away. 

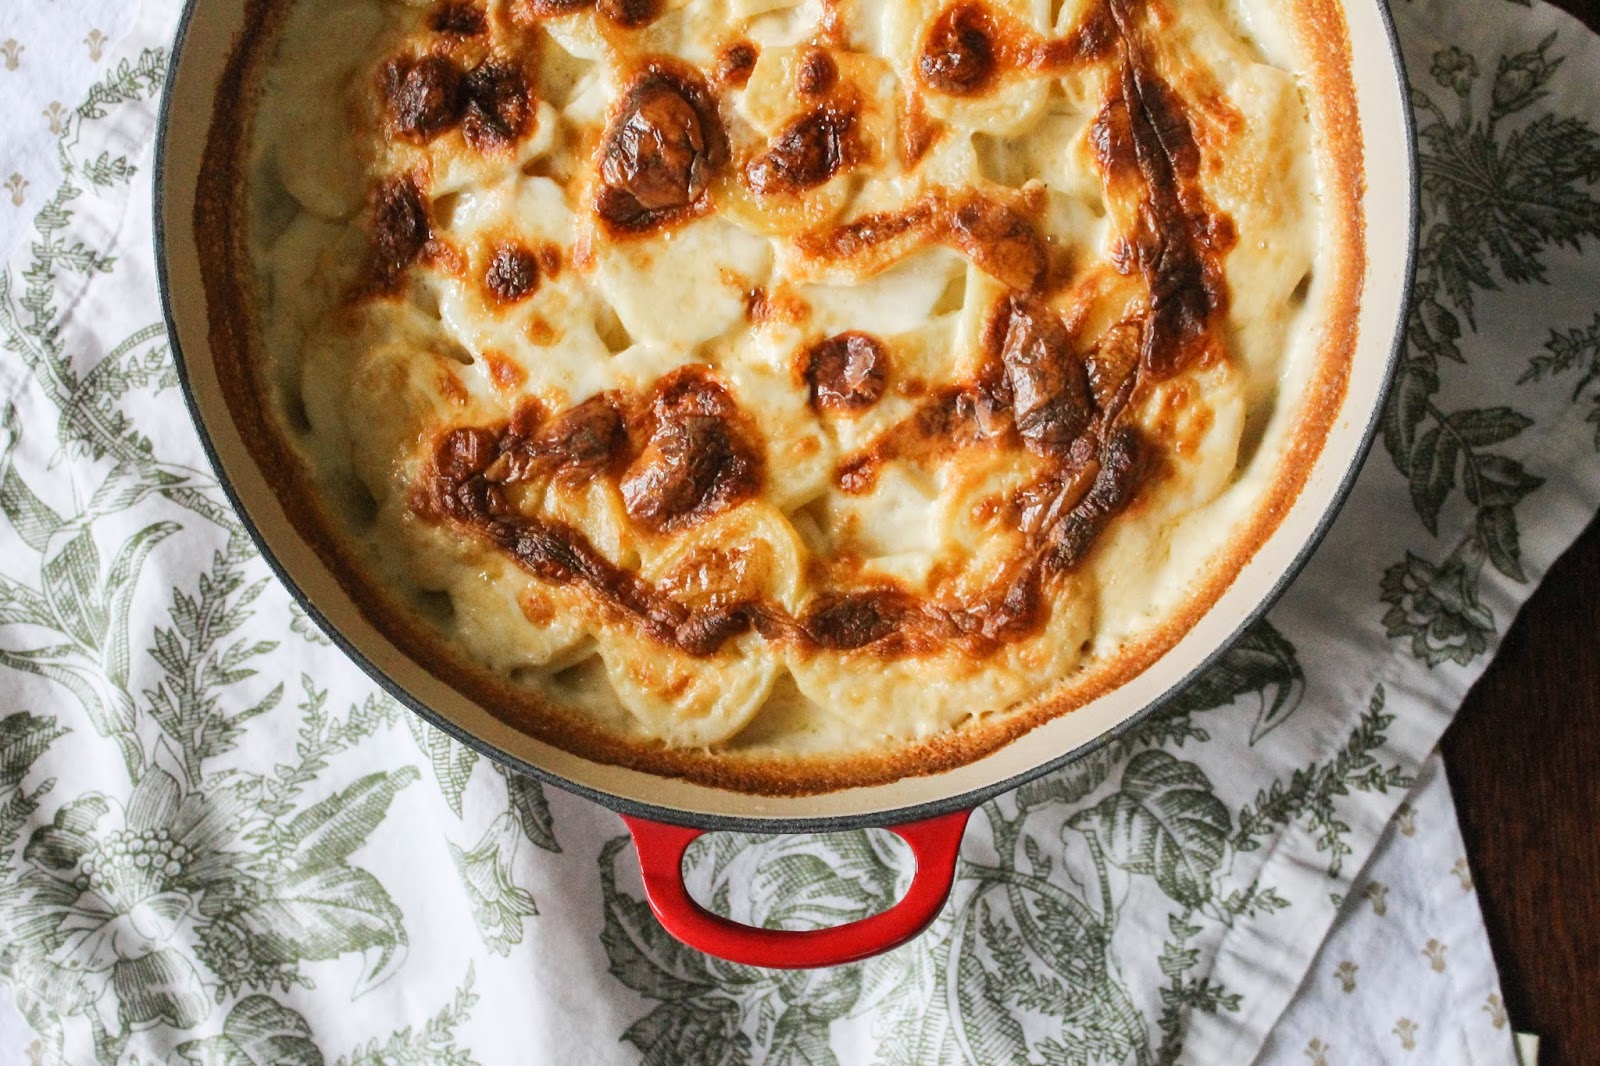
The main reason I had to come up with a good old fashioned family dinner was because I had a yen for dauphinoise potatoes. Not a dish that cozies up quite the same to a ham sandwich (well, maybe when eaten cold the following day- very good, by the way) or a bowl of chili. I love chicken with this, but wanted to use a pork roast so I could have plenty of left overs to go with some super yummy ramen broth I'd been saving in the freezer. Which is why I kept the seasoning of the roast itself pretty simple, and chose the 'wow' factor to come from the groan inducing sherry cream sauce. This sauce is so good, if I could get away with it I'd make extra and serve it in little demitasse cups along the side. Good gravies and sauces are so well loved on my side of the family, that we don't think it is wrong in any way to straight up imbibe them. 

All of these recipes are very simple and can be made with complete ease as long as you have enough time. That is the beauty of a good Sunday dinner - a tiny bit of prep, and then relax on the couch while you enjoy all the luxuriant smells coming out of the kitchen. And, the leftovers. So good, and so many things you can do with them. For example, eating the dauphinoise potatoes cold, straight from the fridge. 
There are lots of dauphinoise potato recipes out there, but my favorite is Jacque Pépin's simple tried and true version. No cheese here folks, and you will not miss it. Not even a little. The aromas that flood your home as these bake in the oven are divine, and my daughter who is a devout potato hater, (even french fries sometimes) gobbled these up without a trace of encouragement. 

INGREDIENTS

for the brined pork roast and sherry cream sauce

1 2 - 3 lb boneless pork loin roast, any silver skin removed
2 quarts cold water
4 garlic cloves, peeled and smashed
12 - 15 pepper corns
1 bay leaf
1/4 cup sugar
1/4 cup table salt or ~1/2 cup kosher, depending on brand
1 Tbsp canola oil

1/3 cup dry sherry
1 shallot, minced
1 garlic clove, thinly sliced
1/2 cup heavy cream + 1/4 cup whole milk, or 3/4 cup half and half
1 - 2 tsp apple cider vinegar
salt and pepper to taste

Place all ingredients except the pork roast in a large pot with a lid. Mix well with a wooden spoon till all the sugar and salt is dissolved. Add the roast, cover, and place in the fridge for 1 to 2 hours, depending on the size of your roast. 

Preheat oven to 375*. Remove roast from the brine and thoroughly dry it off with paper towel. Add the canola oil to an oven safe pan and place over medium high heat. Sear all sides of the roast to golden brown. Place in the oven and roast till internal temp reaches 135*, about 45 minutes to 1 hour 15 minutes, depending on size of roast.

Remove from oven and let rest on a cutting board for at least 15 minutes before slicing. 

Meanwhile, place the pan that the pork cooked in back over medium low heat. Add a touch of canola oil and the shallot. Saute for a couple minutes, then add the garlic and cook for another minute or so. De-glaze the pan with the sherry, scraping up all the brown bits and let reduce by nearly half. Add the cream and milk and bring to a simmer, then reduce heat to low and let simmer for 3 - 5 minutes to let it thicken, stirring often. Stir in the apple cider vinegar, then taste for seasoning. Add any pork juices that have accumulated on the cutting board and stir them in. Since the roast is brined, the pan juices will be quite salty, so it's best to wait till the end to season the sauce if needed. 

Slice into half inch thick pieces and adorn with copious amounts of sherry cream sauce.

for the dauphinoise potatoes

1 3/4 lb potatoes, peeled (I used red bliss, but 
   Jacques recommends yukon gold)
2 1/2 cups whole milk
3 garlic cloves, minced
scant tsp kosher salt
1/2 tsp ground black pepper
1/8 tsp freshly ground nutmeg
1 cup heavy cream
1 Tbsp unsalted butter, softened

Preheat oven to 375*. Combine the milk, garlic, salt, nutmeg and pepper in a large sauce pan. Slice the potatoes 1/8 inch thick and add them to the pan as you go to ensure they don't get discolored.

Butter a large (at least 6 quart) baking dish with the softened Tbsp of butter.

Turn the heat on to medium high and bring the mixture to a gentle boil, stirring often to prevent the slices of potato from sticking to one another.

Once it reaches a boil, add the ingredients to the buttered dish and spread them out evenly. Add the heavy cream. Bake on a baking sheet (just to be on the safe side) for up to one hour, or until most of the liquid is absorbed and the potatoes are easily pierced with a knife. Let the dish stand, covered, for 20 - 30 minutes before serving to allow it to completely set. 
I was in the mood for petit pois with pearl onions swimming in butter for this meal, but endive with mushrooms and peas would probably go even better. 

Dauphinoise Potatoes slightly adapted from Jacques Pépin's Gratin Dauphinoise

Wednesday, October 9, 2013

Ginger Molasses Cookies

We've been watching a lot of Fantastic Mr. Fox lately, and thought it'd be fun to make a special treat that my little one could doubly enjoy since it's referenced in the movie. Mrs. Bean's nutmeg ginger apple snaps seemed like they would be a hit. Alas, I was short on some of the required ingredients and ended up making a simpler version that still turned out quite 'fantastic'. 

They are irresistibly thin, yet still stay soft and very chewy, thanks to to the only sugars being molasses and brown sugar. Even with the heavy amount of ground and fresh ginger, they didn't taste overly gingery and combined perfectly with the rest of the autumnal flavors. The recipe makes a big batch of cookies, and while I was placing a stack of them in the freezer, I knew I'd definitely have to try making these into some dynamite ice cream sandwiches. For next time. 

This version I adapted from Mario Batali's recipe, which I will eventually attempt so we can try the real deal. In case you haven't seen the movie and are wondering how Mr. Batali came about creating this recipe (or even if you have, you may have missed it), Batali has a 'cameo' so to speak as Rabbit, who happened to be a dazzlingly fast chef in the film. 
INGREDIENTS

1 1/2 cups unsalted butter (3 sticks), softened to room temp
2 cups light brown sugar
1/2 cup molasses, preferably not an extra dark variety
2 large eggs
3 1/2 cups unbleached AP flour
2 tsp ground ginger
1 tsp freshly grated nutmeg
2 tsp cinnamon
4 tsp baking soda
1 tsp kosher salt
pinch of ground allspice
3 Tbsp fresh ginger, grated
Preheat oven to 350*. In a standing mixer, cream butter and sugar until light and fluffy, about 6 - 7 minutes, scraping down the bowl once or twice.

In a separate bowl, combine flour, ground ginger, nutmeg, soda, cinnamon, salt and allspice. Whisk together to combine.

Add molasses and eggs to the creamed butter and sugar. Mix on medium low until well combined. Add grated ginger. Adjust speed to low and slowly add the dry ingredients and mix until well combined, about 2 minutes.
If you want to appease any little ones hovering nearby, use pasteurized eggs so they can enjoy some of the delicious dough. Or live on the wild side and let them have just, um, a little.
Line a couple of baking sheets with parchment paper or a silpat. Drop the dough in 1 Tbsp increments, about 6 per sheet to avoid them from running into one another. They spread a lot. You can bake on each sheet of parchment twice before they're spent, then use a fresh sheet. Bake one sheet at a time for 10 minutes, remove from the oven and let sit on the sheet for 1 minute to allow the cookies to set before transferring to a wire rack to cool.
If you don't feel like baking these all at once, simply cover the mixing bowl with plastic wrap and throw in the fridge (it'll keep for 2 days), just add 2 minutes onto the baking time if you're going to bake them straight from the fridge. The dough also freezes well for up to 6 weeks, the baked cookies up to 1 month.

Thursday, October 3, 2013

African Style Carrot Soup

It was a bit difficult for me to decide on a name for this soup, since there is so much going on in it. Some of the prospects were carrot and sweet potato soup with peanut, or speedy african style carrot soup with coconut milk, or carrot, sweet potato and kale soup. I decided to go with the flavor profile that dominated the soup, which is kind of a riff of african style peanut soup, but much heartier and nutritious. 

Not only is this soup super quick and easy to prepare, it can also act as a foundation for a heartier meal, if you prefer. Since this recipe (as most of the ones I put on here) makes a very large batch, I've found that it freezes well and by adding any protein you wish along with a favorite bean or legume. The yield you get from this recipe along with its versatility makes it very cost effective since it keeps in the freezer so well and can be deliciously stretched.

Since I'm writing this with a writhing 2 year old on my lap, I can't really elaborate on why/how I came to making this soup except for the fact that the last time I made carrot soup, the blade broke on my immersion blender since the sliced carrots weren't smushy enough after 30 minutes of cooking. So this time I shredded them so I wouldn't damage my new tool, and wouldn't have to cook the things forever. Needless to say, my little one loved it, especially for how it only kept her out of my undivided attention for a short while.


INGREDIENTS

1 lb organic carrots, scrubbed
3 small or 2 medium sweet 
   potatoes, peeled
1 small sweet onion, diced
3 Tbsp coconut oil
1 Tbsp sweet curry powder
1 tsp corriander
1 tsp turmeric
1/4 tsp allspice
1/4 - 1/2 tsp red pepper flake,
   according to taste
1/4 tsp cardamom
1 14 ounce can low fat coconut
   milk
4 cups low sodium vegetable stock
4 cups water
~8 ounces kale, washed and lightly chopped, removing most of the stems
3 - 4 Tbsp creamy natural peanut butter (more if you'd like your soup extra peanuty)

Place a large dutch oven or heavy bottomed pot on the stove over medium heat. Add the coconut oil and onion along with a fat pinch of kosher salt. Saute for 4 - 6 minutes till onions are beginning to turn translucent. 


Meanwhile, run the carrots and sweet potatoes through the shredder attachment in your food processor, or use a standard cheese grater. Add the shredded root veggies to the sauteed onion and add another pinch of salt along with all the spices. Stir well and reduce heat to medium low and cover. Let cook for about 5 minutes, stirring once to prevent the veg from sticking to the pot.
Uncover and add the coconut milk, stock, water, and peanut butter. Stir well then add the kale with another pinch of salt. Bring to a steady simmer and cover, dialing heat to low. Let simmer covered for 20  minutes, or until root veggies are tender (this may take less than 20 minutes). 

Now your soup is technically done, but I reccomend taking it one step further and blitzing it with an immersion blender (easy and quick way) or using your regular blender. I prefer it smooth, but serve to your tastes.

This dish ended up being vegan unintentionally, but you may want to add a plain yogurt drizzle to offset a some of the heat that the red pepper provides. Or, reserve a bit of coconut milk and drizzle that into your bowl. Both ways are very delicious. 


Thursday, September 26, 2013

Spinach and Chickpeas with Lemony Rice Pilaf

What can I say, rice always seems to make its way into my 'fast and easy' meal choices during the week. Needless to say, we eat a lot of rice in our house, and my version of rice pilaf has a bit of delightful toasted orzo added to it, transforming it into what my husband likes to call 'rice a roni, but better.' 

This one is especially quick since a lot of the ingredients are easy to keep on hand for whenever the mood strikes you to whip something like this up. It's definitely filling enough for a meal for 3 and elegant (and easy) enough as a side with a larger meal for special guests. I put mushrooms in just about everything, but feel free to tweak it by adding or subbing in some of your favorite veg. 
 INGREDIENTS

for the lemony rice pilaf            


1 cup of your favorite long grain rice
1/2 cup orzo pasta
1 Tbsp extra virgin olive oil
1 Tbsp unsalted butter
1 small onion, finely chopped
peel and juice of medium lemon
2 tsp sea salt
3 cups low sodium chicken broth

for the spinach and chickpeas

1 lb bag of frozen organic chopped spinach
1 14 oz can chickpeas, drained, rinsed
   and smashed a bit with potato masher
1 medium onion, chopped
10 oz cremini or button mushrooms, sliced

3 cloves garlic, sliced
2 Tbsp extra virgin olive oil
salt and pepper to taste
                                                             
Place a medium pot that has a tight fitting lid over medium heat. Add the oil, butter and onion and saute till the onion begins turning translucent, about 5 minutes. 

Add the orzo and stir constantly till the orzo has become golden brown. Add the rice and stir for another 2 minutes, then add the broth, lemon juice and peel. Bring to a boil over high and stir once, then cover and reduce heat to low. Cook for 20 minutes, then remove from heat and let sit covered for 10 additional minutes. 

While the rice is cooking, place a large skillet over medium heat and add the oil and onion with a pinch of salt. Saute till softened, about 7 minutes. Add the mushrooms and cook till the liquid has released, then add the frozen spinach and another pinch of salt. Cover and cook for 5 minutes, then uncover and cook for another 5 - 7 minutes, stirring occasionally. Add the chickpeas and stir well, cooking long enough for them to be heated through. 

Remove the lemon peel from the rice and fluff with a fork. Serve the spinach and chickpeas over the rice and top with the feta or parm. This dish is great served family style, particularly if it will be as a side, or in individual bowls.


Monday, September 23, 2013

Twice Cooked Pork with Sofrito Rice

Recently my mom was asking me if I knew of some versatile new seasoning she could try to liven up her cooking a bit. I felt a bit stuck in a rut myself, and remembered that I've always wanted to try making sofrito but have been too lazy... so of course I told my mom she should make it, since she usually has more gumption than me in the kitchen. Luckily my mom has always been very generous, and froze me a cup of this amazing stuff. It can really go in just about anything, particularly any Latin American dish, and make it something really spectacular. Sofrito is so fragrant that its pungent aroma can be noticed through a zip lock bag, after the sofrito has been frozen. 

I had a bunch of leftover braised pork shoulder from a ramen experiment, and had no idea what to do with it. I remembered the sofrito my mom had left me in the freezer and knew I should incorporate that. I just started cooking, not having any clue where I was going to end up, but thankfully I wrote it all down because this meal ended up being really tasty. Not to mention fast, which is what I needed the day I made it since my daughter needed my undivided attention, hence the lack of photos in this post. 

INGREDIENTS

for the sofrito rice

1 cup of your favorite long grain rice
1/2 medium yellow onion, finely diced
1 Tbsp sunflower oil
1/2 cup sofrito 
1 3/4 cups low sodium chicken stock or water
2 tsp adobo seasoning

for the twice cooked pork

~2 lb cooked pork shoulder (about 4 cups)
   -I prepared mine by slowly braising it in a stock that had been made by simmering dried 
    shitake mushrooms and kotsuobushi, but any way you've cooked it (unless its been 
    slathered in barbecue sauce) where a mild flavor is yielded should work.
2 tsp smoked paprika
2 Tbsp vegetable oil
1 heaping Tbsp adobo seasoning
1 tsp cumin
6 - 8 garlic cloves, peeled and smashed
1 Tbsp tomato paste
1/2 cup unfiltered cider vinegar
2 cups low sodium chicken stock
a few splashes of your favorite hot sauce

1 can black beans, drained and rinsed

Place a medium pot over medium high heat and add the sunflower oil and onion. Saute for about 3 minutes, then add the sofrito. Cook till nearly all the moisture has evaporated, then add the rice. Saute for a few minutes till most of the rice has toasted a bit and turned opaque. Add the stock or water and adobo. Bring to a boil, giving it a couple good stirs while it comes up to temp. Cover and dial heat back to low and cook for 15 minutes. Remove from heat and let the rice sit for another 10 - 15 minutes, covered. Don't peek! 

While the rice is cooking, place a large enameled cast iron pan or non-stick skillet over medium heat. While the skillet is heating up, quickly pull apart the cooked pork if needed. Add the oil and pork to the pan, followed by the garlic. Saute for 5 minutes, then add the remaining ingredients and give it a good stir. Cook and stir occasionally till nearly every bit of moisture has evaporated and the pork starts sizzling again. Add a bit more vinegar or hot sauce to taste. 

Fluff the rice with a fork and serve in a large bowl, topping it with the pork and black beans. Serve with lots of hot sauce, or some nice crema and cilantro, or serve it along side some corn tortillas or roll it all up in a burrito. Either way, it's going to be really delicious.

*updated 9.24.13

Tuesday, September 17, 2013

Ode to Cincinnati Chili

Before ever trying Cincinnati style chili, I knew I'd love it. Tons of noodles, melt in your mouth ground beef, and copious amounts of bright orange extra sharp cheddar cheese. Oyster crackers are optional, yet essential in order to soak up that little pool of ethereal grease floating on top. 

The first time I had it wasn't in Cincinnati, but in my hometown of Milwaukee at Real Chili. It was not a good experience. Although they don't boast their recipe as being 'Cincinnati' style, that is basically what it is. I went there with my husband while I was pregnant, and needless to say I was very excited about what I was about to experience. When I witnessed the server pull up a heaping ladle of the stuff, without mixing in the grease slick on top, I knew I was in for trouble. My bowl consisted of noodles literally drowning in grease, with a bit of chili on the side. Not so good, and the little person that I was sharing my meal with had quite the acrobatic show to let me know that she wasn't having it. If only she had stirred the pot before filling my bowl! It would've been such a more enjoyable experience. I knew that despite the extremely off ratio of chili to grease, the chili was really good. Yet I needed a good home experience before I'd venture out for this kind of chili again.
So began my mission to find an easy yet authentic and genuinely good version of this chili with so much potential. I found a great one by Dax Phillips that I've slightly adapted, and it's truly dynamite. I serve it up a bit differently than true Cincinnati style that offers up to '5 Ways' to adorn the chili. Noodles are a given - I used orzo tossed with a touch of butter and a bit of freshly ground nutmeg that pairs amazingly well with the chili. And since I adore beans, I put them in the chili instead of on the side... and I may be insulting some people here, but black beans made their way in with the kidney beans. Although there wasn't much grease left for the oyster crackers to soak up due to the brilliant method of cooking the beef before adding the spices and other ingredients, they were a welcome addition. I've got a couple ways to enjoy the large amount you'll probably have leftover that I usually did with my Turkey and Soy-Rizo chili, such as Cheesy Chili Mac, which is always a huge hit in our house.

INGREDIENTS

3 lbs ground beef, up to 90% lean
7 cups water
2 bay leaves
5 Tbsp chili powder
3 Tbsp cocoa powder
1/2 tsp allspice
3 tsp adobo or 5 tsp kosher salt
1 tsp pepper
1 Tbsp cinnamon
1 tsp cumin
1 Tbsp smoked paprika
3 Tbsp cider vinegar
3 Tbsp Worcestershire 
1 can kidney beans, drained and rinsed
1 can black beans, drained and rinsed
1 28 oz can + 14 oz can salt free diced tomatoes OR
   8 large tomatoes, peeled and diced
cooked orzo pasta for serving, with lots of grated extra sharp cheddar and toppings of your choice

Set a large dutch oven or heavy bottomed pot over medium heat and add the ground beef and water. Bring to a steady near boil and cook till nearly all the water is gone, about 45 minutes to an hour. While your beef is cooking, skim the fat and 'scum' off the top and discard. You may find it hard to believe at first, but your beef will end up looking like this at the end of the process-
Add the remaining ingredients all at once(!), except for the beans, noodles and toppings, of course. Give it a good stir and bring to a gentle simmer
After the chili has cooked for a bit, it should look a bit like this-
Reduce heat to low, cover and cook for 2.5 hours, stirring occasionally. Add the beans and cook for another 30 minutes, uncovered. Once the chili is done, the tomatoes will have completely disintegrated in the chili and it will be a deep, rich brown color. Yum. Remove the bay leaves and discard.

Boil up enough orzo pasta to yield ~4 cups (nearly a pound) and toss with 1 Tbsp unsalted butter and 1/4 tsp freshly grated nutmeg. Serve chili atop the orzo with finely chopped red onion, lots of grated extra sharp cheddar (preferably the neon orange variety) and oyster crackers.

The original recipe states that one should let the chili cool to room temp and store in the fridge overnight to develop the flavors as well as skim off any additional fat that rises to the top. I've tried this way once, and I didn't feel it was a necessary step since there was nearly no grease sitting on top of the chili. The flavors do develop a touch after a night in the fridge, but after smelling this chili cooking for a few hours, I doubt you'll be able to wait that long.

Recipe adapted from Dax Phillip's Cincinnati Chili

Saturday, September 7, 2013

Tom Kha Kai

Tom Kha Kai is probably my favorite soup of all time. A few years ago a close friend's boyfriend and fellow culinary enthusiast 'El Capitan' showed me his way of preparing it. Since I always get a hot pot of this whenever I go out for Thai food, I was extremely stoked to learn how to make it at home. Although the ingredients were much more exotic than what I was accustomed to, it's a fairly simple soup to make. It takes some time, and a lot of tasting to get the perfect balance of flavors that suit one's own tastes. And it is very, very worth it. 

This soup can be made with a wide variety of add ins, and El Capitan favors lots of seafood in his version of Tom Kha. Since there are some shellfish allergies in my family, I only use chicken, which is what the 'kai' is for. Any asian grocery should have the ingredients you need for this, and they are all inexpensive. Most of them can be frozen as well, and are used in tons of other authentic Thai and Laos cuisine. I've included some photos of most of them so if you've never used them in your own cooking, you'll be able to find them with ease. 


galangal

and 

kaffir

lime

leaves


palm 

sugar

and

lemongrass


Galangal and kaffir lime leaves can be well wrapped in wax paper then placed in a freezer bag and be frozen for up to 3 months. The palm sugar keeps for a very long time in your pantry, and the lemongrass is the only thing that can't be kept for longer than a week in the fridge. Palm sugar comes in large discs, or jars of smaller, tablespoon size pucks. I went for the puck variety since it was easier to gauge the amount used. Galangal looks similar to ginger, and is a bit similar in taste as well, yet there is a very noticeable difference, so it is pretty essential to use rather than ginger. The kaffir lime leaves, lemongrass and galangal are used to flavor the broth, which is the base of the soup and gives it its characteristic background of flavors. 

Here are some of the beautiful oyster mushrooms I bought for the soup. Normally straw mushrooms are used, yet I didn't find any fresh ones at the store, so I preferred these. They have a mild mushroom flavor, which is another important factor. You don't want any ingredient's presence to outweigh another's in this recipe, so it's important to use a subtly flavored mushroom. Cremini or shitake are definitely out. 

My favorite Thai restaurant has broccoli and snow peas in their tom kha, so that's what went into mine as well. Traditionally bird's eye chilis are used to add the heat, but since we were sharing this with a 2 year old, I backed off of those and relied on sambal, sriracha and good chili oil to spice up our own bowls. A couple of chicken breasts, lots of coconut milk, cilantro and good chicken stock, and you're in business baby.

INGREDIENTS

2 quarts low sodium chicken broth, or homemade
5 14 ounce cans of your favorite full fat coconut milk
2 stalks lemongrass, pounded fiercely with the back of a knife & cut into thirds
8 - 12 kaffir lime leaves, depending on size
3 - 4 inch piece galangal, sliced
~3 palm sugar discs, crushed (this is where your tastes come into play - you may like this soup a tad sweeter than myself)
2 cups snow peas, halved
3 cups broccoli florets
12 - 16 ounces oyster mushrooms, stems removed and torn into bite sized pieces
2 - 3 boneless skinless chicken breasts
1/2 - 3/4 cup fish sauce (again, you may want more or less of this, so start small)
juice of 6 - 8 limes
1 bunch cilantro, leaves removed and set aside
lots of sambal, sriracha and chili oil to taste
cooked jasmine rice (optional)

In a very large pot (at least 6 quarts) over medium heat, add the chicken broth, coconut milk, lemongrass, kaffir lime leaves and galangal. Bring to a low simmer and dial back heat to low. Once at a simmer, let the ingredients steep for 30 minutes or so. Your kitchen should smell very fragrant, and the broth should taste quite strong. Remember, you will be adding quite a few other ingredients, and this infusion should not be diluted, but complimented. Remove the leaves, lemongrass and galangal with a slotted spoon and discard.

Keeping the heat on low, add the chicken breasts and poach till fully cooked, about 15 - 20 minutes depending on size. Remove and set aside to cool. Shred into large yet bite sized pieces.

Add the crushed palm sugar, lime juice and fish sauce. Then taste, taste, taste! I find that I like a lot of fish sauce in this. Although it is incredibly pungent, it helps develop the unique taste of this soup, and you may need more than you think. Ideally there should be an equal balance of sour, sweet, salty and spicy, with the major umami boost that the fish sauce provides. Some like a bit more lime than sugar, more spice than umami. Start with the minimal amounts and go from there. Ensure that the broth simmers for a few minutes with a few thorough stirs before tasting so that the additions are well incorporated.

Once you have a nice balance going in your soup, dial up the heat to medium and add the broccoli and mushrooms. If you'll be using straw mushrooms, use about 2 - 3 drained cans. Cook for 5 minutes before adding the snow peas and shredded chicken. Once the chicken is warmed through, its ready to serve.

Add a few sprigs or a handful of cilantro and sambal, srirach, and/or chili oil to taste. Serve over several spoonfuls of jasmine rice. Any leftover soup can be frozen for up to 1 month.

Recipe adapted from El Capitan (aka GT, Spacemage)